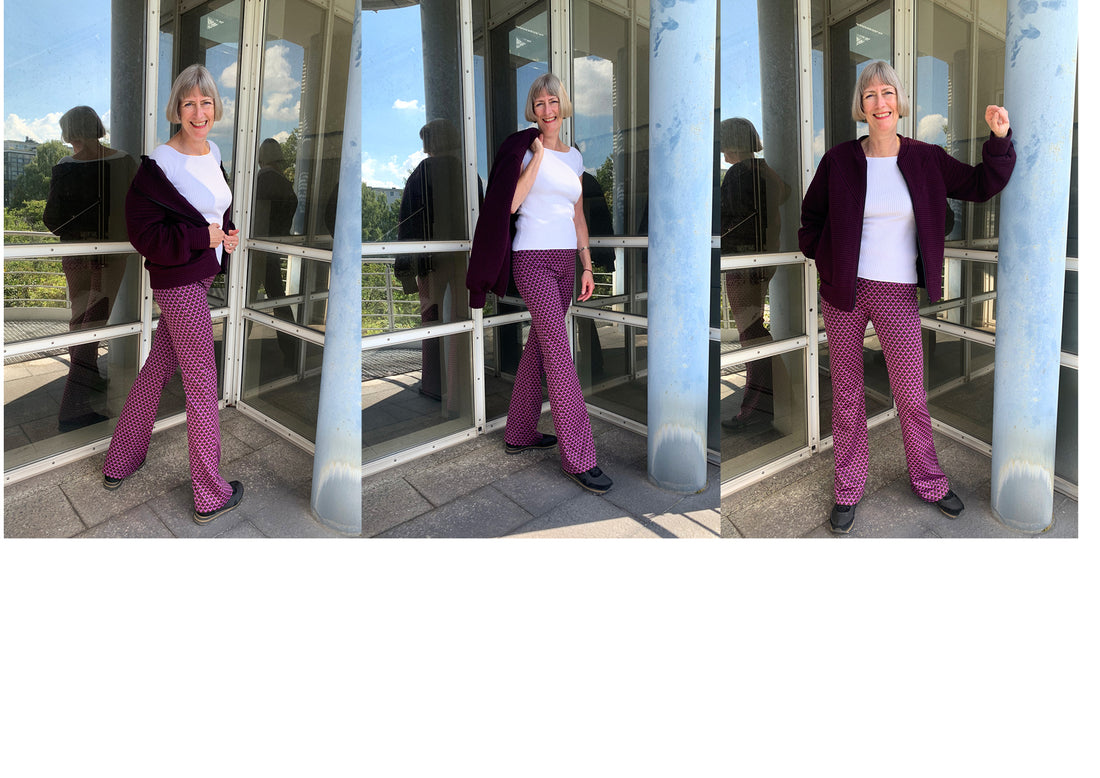
Pants Zora
Inside leg length: 86.5 cm
Level : easy - for beginners
Material:
Depending on your wishes, we recommend a thicker jersey with elastane or a functional product , also with elastane.
Size 34-44:
• Outer fabric: 1.30 m x 140 cm wide
Size 46-50:
• Outer fabric: 1.70 m x 140 cm wide
Elastic band: 0.62 - 1.00 m x 4 cm wide
Here is a helpful video on how to shorten your pants if necessary.
Cutting:
Cut the pattern pieces from your outer fabric. Lay the fabric right side up. The pattern pieces should all lie face up. Always align the thread arrow in the same direction on all pieces and parallel to the selvedge of the fabric. Transfer all the clippings from the pattern through a 3mm long incision with scissors or chalk. Clip the seam allowance in the fabric fold because this is always a center. Markings define positions of dart ends, pocket positions, and much more. Transfer these either with chalk or pins.

What you need from fabric:
- 2x front trousers opposite
- 2x rear pants opposite
- 1x waistband
Sewing instructions:
To sew these trousers you will need a sewing machine and an overlock sewing machine, or alternatively the zigzag stitch on your sewing machine to neaten the cut edges.
Be sure to use a jersey needle and use a stretchy stitch, i.e. if you are sewing with a household sewing machine, you should use either a zigzag stitch or the three-part elastic stitch and then all seam allowances again with a zigzag stitch or another appropriate stitch Neaten so they don't fray. In addition to the description, the colorful lines in the pictures show you where a seam needs to be sewn or something needs to be glued.
When sewing, pay attention to the seam allowance included in the pattern. Seam allowances that are not specifically marked are 1cm wide!
Have fun sewing!

First of all, finish the trouser legs on all edges except the hem and waist lines. Then you can close the side seam.

In the next step you close the inside leg seam.

We continue with the crotch seam that connects both trouser legs together. This is sewn from the center back to the center front of the waist line (or vice versa). To do this, turn one trouser leg to the right side and tuck it into the other leg.

In the next step you process the cuff. To do this, first sew the side seam together, leaving a small opening through which you can later pull the elastic. Then iron the cuff in the fold (wrong side up) and sew an auxiliary seam the width of a quilting foot along the open edge.

In the next step you sew on the cuff. Place the cuff with the seam at the center back and start sewing from this point.

Finally, pull the elastic band through the opening. Place the ends of the ribbon on top of each other and sew them together. The connecting seam should be so tight that it does not tear when the cuff is pulled. Then sew the waist seam. Iron up the hem of the trouser legs and neaten the hem edge. Finally, sew the hem in place.
Your ZORA is ready! If you don't know what to do next or have any questions, please feel free to contact us by email at info@schnittmuster-berlin.de . We will respond to you as quickly as possible.
Have fun with your new designer piece!
Warmest regards, your Sewing Pattern Berlin team.