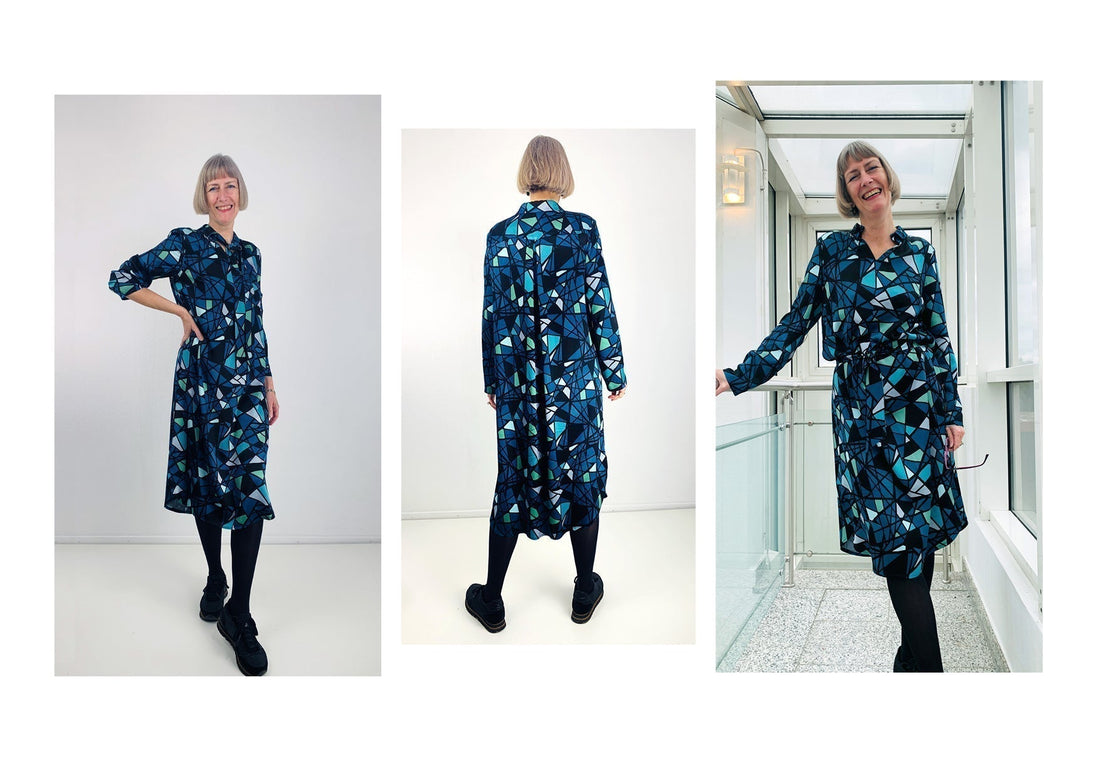
Dress Zadie
The Zadie dress captivates with its understated elegance and timeless lightness . With its subtle pleat in the back, simple yoke, and sporty V-neck in the front, it's the perfect choice for anyone looking for an uncomplicated yet sophisticated dress. The unique stand-up collar allows for a playful tie, while the rounded hem and short side slits provide extra freedom of movement and a relaxed, casual look.
Length at the back center = 115cm.
Zadie was sewn from a soft, flowing viscose fabric in this tutorial.
Sizes 34-42
- Outer fabric 2.10m x 140cm wide
Sizes 44-50
- Outer fabric 3.00m 140cm wide
Sizes 34-50
- Insert 0.60m 90cm wide
Cut:
Place the fabric with the right side of the fabric facing up.
Lay the selvedges parallel to the center so you can lay out the front and back pieces on the fold. For guidance on pattern layout, feel free to refer to our fabric calculation.
All the cut pieces should be placed with the writing facing upwards.
Cut the pattern pieces from your outer fabric.
Always align the grainline arrow in the same direction for all pieces and parallel to the selvedge of the fabric.
Transfer all notches from the pattern by making a 3mm long incision with scissors or with chalk.
Make notches in the seam allowance on the fold of the fabric, as this is always the center point. Markings define the positions of dart ends, pocket positions, and much more. You can transfer them using either chalk or pins.
Seam allowances are included - 1cm wide or as indicated by the marking notches!


You will need the following fabric:
- 1x front part in breakage
- 1x back piece in half
- 2x sleeves, mirrored
- 2x Passe back part in the fold
- 2x stand-up collar inside at the break
- 1x stand-up collar outside in the fold
- 1x front part of the document in the fold
- 2x ties/loops opposite each other in the break

Also includes insert:
- 2x stand-up collar inside at the break
- 1x stand-up collar (outer) in the break
- 1x Front part of the document in the break
Sewing instructions:
Seam allowances are included – 1 cm wide or as marked.
To sew this dress you will need a sewing machine and an overlock sewing machine, or alternatively the zigzag stitch of your sewing machine to finish the cut edges.
The yellow and red lines in the pictures show you, in addition to the description, where to sew a seam or finish an edge.
Have fun sewing!
STAND-UP COLLAR PROCESSING
Start your sewing project by working on the stand-up collar.
The stand-up collar consists of 3 parts. We call the short collar part A and the two collar parts of equal length B and C. Collar part A later forms the tunnel for the tie.
 A
A
You start with the front part of the stand-up collar A. You fold the sides in twice by 0.7cm and stitch them down.
 A on B
Next, stitch collar A to B, wrong sides together. Make sure the markings/center back are aligned.
 C
C
Next, we continue with the stand-up collar C. Here, you iron the seam allowance over by 1 cm. Collar. C will later be the inner collar stand.
 B and C
Next, you can sew collar pieces B and C together, right sides facing. Trim the collar corners so the fabric lies flat.
When ironing, it is important that the upper edge of collar part B is rolled slightly downwards so that you can optimally hit the inner collar later when sewing in the shadow of the seam.
Then the collar is finished for now.
 collar outside
 Inside collar
FRONT AND BACK PANEL WITH FITTING PROCESSING
 View from the outside
 View from the interior
Next, we'll work on the yokes and the front piece. Place the front piece between the two back yokes and sew the shoulder seams.

Here you can see what the front part should look like when it is connected to the two yokes.

Next, you secure the back neckline in the yoke with a temporary stitch.


Now, following the cutting instructions, you create the fold in the back piece and secure it with a basting stitch.
Next, we'll look at the evidence for the cutout in the front.


First, you neaten the facing edges and the bottom edge and iron them over by 0.7cm.
Then you can stitch the facing right sides together onto the front slit. Make a cross stitch at the point.
Now you clip the seam allowance at the point up to the sewing line. Also, trim the corners at the top of the slit.


Now fold the facing inwards, iron everything flat and stitch the neckline seam using the template.
 View of back panel inside
Next, we'll work on the front and back pieces. Sew the outer back yoke to the back piece, right sides together. You can also use the burrito method for this!

Now comes a slightly tricky part. The two back yokes need to be joined together. To do this, use the burrito technique: roll the front and back pieces between the yokes and sew both yokes together, right sides facing.
Then you pull the rolled-up parts out again.


Front and back views of inverted passes.


Now collar B can be sewn to the neckline at the markings, right sides together.
Then the inner collar, which is folded in by 1 cm at the bottom edge, is topstitched in the shadow of the outer collar's seam. Make sure that the outer collar retains a minimal roll.

View of inner collar

Now the bust darts in the front are closed.
The dart filling is then pressed upwards.


Next, we'll sew the side seams. Place the front and back pieces right sides together and sew the side seams up to the slits. Then, clip the seam allowance slightly at the beginning of the slit.

Then you can neaten the seam allowances together up to the incision.


Next, we'll finish the hem. First, sew a guideline 0.7cm away from the hem curve.
Hold this guideline lightly in the curve (pull the thread gently) so that the hem edge can be folded over neatly. Then fold the hem edge over twice by 0.7 cm and topstitch it.


SLEEVE PROCESSING
Close the side seams of the sleeves and finish the seam allowances. Then fold the sleeve hem over twice by 1 cm and topstitch it.

The sleeves are inserted into the armholes, right sides together. Pay attention to the notches so that the right sleeve doesn't end up in the left armhole ;-). Then, finish the seam allowances together.


Now all you have to do is finish the bow.
First, sew the center back seam right sides together and press the seam allowance open. Then, turn the loop right sides together, leaving a small opening for turning. Trim the seam allowances at the corners, then use a wooden spoon to turn the garment right side out. Finally, topstitch the opening closed close to the edge.
Take a look at the sewing instructions for the Kelly overall, or the Kira trousers; there are photos of the "cooking spoon method" there.
Finally, the loop is pulled through the tunnel of the collar.
Your Zadie is finished!
If you get stuck or have any questions, please feel free to contact us by email at info@schnittmuster-berlin.de. We will reply as soon as possible.
Have lots of fun with your new designer piece!
Your sewing pattern team