Sewing instructions for the Adelaide blouse
Level : Intermediate - for experienced players
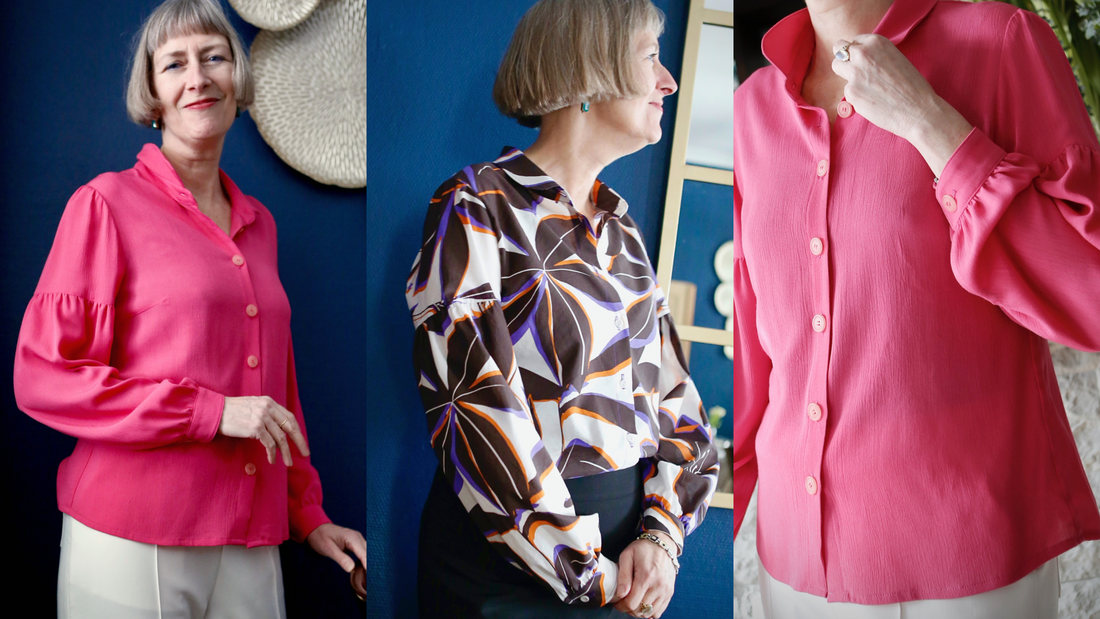
Adelaide was sewn from a thin cotton print in this tutorial.
Materials needed:
We recommend a cotton poplin or a thin cotton with some body , but you can just as easily use viscose or silk .
| Sizes 34-42 | Outer fabric | 1.60 m | 140 cm wide |
| insert | 0.70 m | 90 cm wide | |
| buttons | 9 pieces | 1.2 cm diameter | |
| Sizes 40-50 | Outer fabric | 1.90 m | 140 cm wide |
| insert | 0.70 m | 90 cm wide | |
| buttons | 9 pieces | 1.2 cm diameter |
Cut:
Seam allowances are included - 1cm wide or as indicated by the marking notches!
Cut out the pattern pieces from your outer fabric and interfacing. Place the fabric right side up. Align the selvedges parallel to the center so you can lay out the back piece, collar stand, undercollar, and upper collar on the fold. All pattern pieces should be laid with the printed side facing up. Always align the grainline arrow in the same direction on all pieces and parallel to the selvedge of the fabric. Transfer all notches from the pattern by making a 3mm snip with scissors or using chalk, and mark the ends of the darts. Snip the seam allowance on the fold, as this is always the center point. Markings define the positions of dart ends, pocket positions, and more. Transfer these either with chalk or pins. It's best to roughly cut out all outer fabric pieces that will be fully interfaced first. After you've secured the interfacing, cut them out precisely. There's also a video here about gluing and securing pattern pieces.

You will need the following fabric:
- 1x back piece in half
- 2x front part, mirror image
- 2x upper sleeves, mirrored
- 2x lower sleeves, mirrored
- 2x Band slot

also with insert:
- 2x collar bar in fracture
- 1x upper collar in half
- 1x undercollar in half
- 2x inner cuff, opposite each other
- 2x outer cuff, opposite each other
Sewing instructions:
To sew this blouse you will need a sewing machine and an overlock sewing machine, or alternatively the zigzag stitch of your sewing machine to finish the cut edges.
The colored lines in the pictures show you, in addition to the description, where to sew a seam or glue something.
When sewing, pay attention to the seam allowance included in the pattern. Seam allowances not specifically marked are 1 cm wide!
Have fun sewing!


Now you can sew the side seams of the front and back pieces together, right sides facing, and finish the seam allowances together. Then press them to the front.

Sew the shoulder seams together, right sides facing, and then finish the raw edges. Press the seam allowances to the front.

Now you'll move on to the sleeve and begin finishing the slit. The sleeve has a cuff with a so-called rolled slit. To do this, place the slit strip, right sides together, under the slit in the sleeve. Place both under your sewing machine and sew the strip in place, aligning the edges with the slit, starting at 0.7 cm. At the tip of the slit, the seam allowance is only about 2 mm and ends at 0.7 cm again. This means the slit runs straight from 0.7 cm to 0.2 cm and back to 0.7 cm, while the seam allowance of the slit strip remains at the same distance throughout (see photo).

Now iron the strip onto the right side of the sleeve, fold it over twice and topstitch it close to the edge on the right side.

The upper corner of the slit is secured on the inside of the sleeve with a diagonally upward-running seam.

Now the slit can be finished and ironed to the correct side. The photo above shows the left arm for reference; a slit can always be opened to the back when the garment is worn.

On the lower sleeve section, you'll need to create gathering stitches along the upper edge. These stitches help achieve even gathering. Select the longest stitch setting on your sewing machine. Do not backstitch at the beginning or end of the gathering stitches; leave approximately 10 cm of thread leading. Sew two gathering stitches about 1 cm apart, positioned 0.5 cm and 1.5 cm from the cut edge, so that the final seam will be sewn precisely between these two stitches. Pay attention to the pattern markings to determine the area where gathering is required.


Now, carefully pull the two lower threads on one side and gather the fabric until you reach the seam width of the upper sleeve piece. You can now distribute the gathers evenly.

Now you stitch the lower sleeve piece right sides together to the upper sleeve (not like me, silly me...didn't look and already wrong...I'd already pulled out the raking threads, oh dear!!) and then you remove the raking threads by pulling out the bobbin thread.
Now the seam allowance is finished together, ironed upwards and topstitched at 0.5cm.

Now close the sleeve seam and neaten the seam allowances together. These are then pressed forward.

Next, repeat the process with the gathering threads at the sleeve hem to ensure an even gather when you attach the cuff.

Next, you make the cuffs.
Place them right sides together and fold over the outer edges.

To ensure the curves lie flat, trim the seam allowance slightly narrower and carefully make a few wedges into the seam allowance of the curve.

Now turn the cuff right side out and iron the folded edge flat.

The inner cuff is pinned to the left side of the sleeve hem, right side down. Now, pull the gathering threads tight again until the sleeve hem matches the length of the cuff, and then stitch it in place.

The outer cuff is folded over 1 cm at the top edge and topstitched close to the edge. If you want your cuff to have topstitching, like in our example, you can topstitch it all the way around. (But I wouldn't recommend it; it wasn't easy, and I'm a pro.)

Now the sleeve is complete and can be sewn into the prepared body, right sides together. Pay attention to the notches in the pattern. The seam allowances are finished together and pressed into the sleeve.

The hem is folded over twice by 1 cm and stitched down.

Now let's move on to finishing the shirt collar. First, prepare the collar stand. Iron the outer edge of the stand over by 1 cm.

The upper and lower collars are placed right sides together and sewn with a 1 cm seam allowance. Just like with the cuff, you trim the seam allowance slightly narrower and also cut a few gussets into the curve.


Your Adelaide is finished!
If you get stuck or have any questions, please feel free to contact us by email at info@schnittmuster-berlin.de. We will reply as soon as possible.
Have lots of fun with your new designer piece!
With love, Ellen and little Anja, hehe