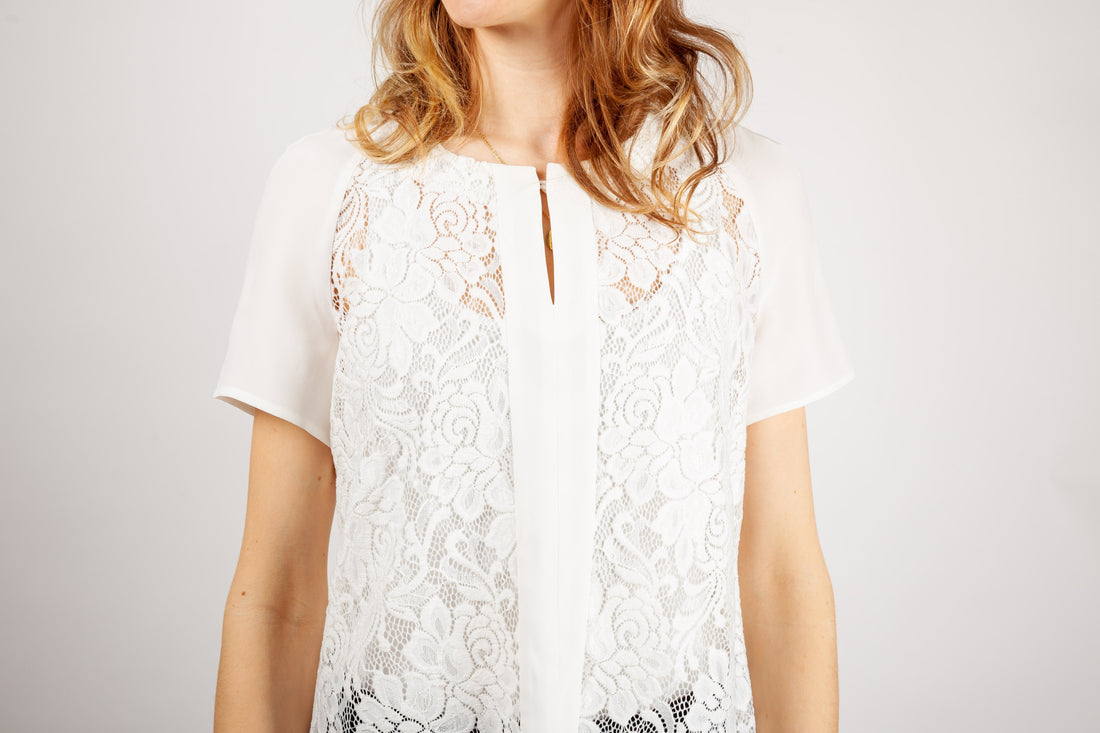
Sewing instructions for the Suvi blouse
Following the successful collaboration with Manu from emilea.berlin on the Emilea and Emil hoodies and the Svea jacket , a fourth cut has been created – the Suvi blouse . Suvi is a casual summer blouse with a very clean and unfussy cut – very emilea.berlin. Its special feature is definitely the double stripe in the center front, which is perfect for working with contrasting fabrics. The round neckline with a slit and raglan sleeves complete this blouse cut, which is just as impressive in a sophisticated combination of lace and silk as it is in a sporty version made of linen or cotton.
Length at the center back = 62-68 cm
Suvi was sewn from silk in this tutorial.
Required materials:
We recommend linen, silk or light cotton.
| Sizes 34-42 | Outer fabric 1 | 1.00 m | 140 cm wide |
| Sizes 44-50 | Outer fabric 1 | 1.40 m | 140 cm wide |
| Sizes 34-50 | Outer fabric 2 | 0.70 m | 140 cm wide |
| Sizes 34-50
Sizes 34-50 |
insert
Button |
0.35 m
1 piece |
90 cm wide
8 mm diameter |
Cutting:
Seam allowances are included - 1cm wide or as per marking clips!
Cut out the pattern pieces from your outer fabric and interfacing . Lay the fabric right side up. Place the selvedges parallel to the center so that you can place the front and back pieces on the fold. The pattern pieces should all be laid with the writing facing up. Always align the thread take-up arrow on all pieces in the same direction and parallel to the selvedge of the fabric. Transfer all notches from the pattern by making a 3mm long slit with scissors or chalk and mark the ends of the darts . Notch the seam allowance on the fold of the fabric, as this is always the center. Markings define the positions of dart ends , pocket positions, and much more. Transfer these either with chalk or a pin . It is best to cut out all outer fabric pieces that are to be completely covered with interfacing roughly first. After you have secured the interfacing, cut it out precisely. There is also a video here about gluing and securing pattern pieces.

You will need fabric:
- 1x back part in the fracture
- 2x front part opposite
- 2x sleeves opposite
- 2x front panel opposite
- 1x panel at the back in the break
- 1x eyelet

also with insert and shaping band:
- 1x receipt-back in the break
- 2x receipt-front opposite
Sewing instructions:
Seam allowances are included - 1cm wide or as per marking clips!
To sew this blouse you will need a sewing machine and an overlock sewing machine, or alternatively the zigzag stitch on your sewing machine to neaten the cut edges.
In addition to the description, the colored lines in the pictures show you where a seam needs to be sewn or something needs to be glued.
When sewing, pay attention to the seam allowance included in the pattern. Seam allowances not specifically marked are 1cm wide!
Have fun sewing!


Now take your cut front panel and place it, right sides together, along the front edge of the front piece. Note the notches in the pattern.
The seam allowances are neatened together and ironed forward. 
Next, neaten the center front from the hem to 3 cm above the top notch in the pattern. The notch defines the length of the slit in the center front. 
Here you can see a detailed photo of the processed front parts. 
Now you can place both front pieces, right sides together, and sew them together until the notch is notched. Press the seam allowances open.
Double-iron and iron the hem according to the notches in the pattern.
Next, close the dart (shoulder seam) of the opened sleeve, right sides together, up to the mark in the pattern. 
The sleeve dart is then neatened together, and the excess threads at the ends are pulled into the seam with a needle and neatened separately. The seam allowance is pressed forward.
Iron the hem of the sleeve twice and over according to the notches in the pattern. 
Close the sleeve seam, right sides together, neaten the seam allowances and iron them to the back. 
Now all you have to do is sew the double folded hem close to the edge and your sleeves are finished. 
Now let's move on to the facings. Place the front facings, right sides together, and sew them together until the notch is notched. You can either iron or fold the seam allowances apart. 
The lower cut edge of the front and back facing is then neatened. 
Iron the finished cut edge of the front facing 1cm. 
Iron the finished cut edge of the back facing 1cm. 
To prepare the eyelet, a small roll is pulled through. Here's a video where Dagmar explains how it's done.

Your eyelet ribbon for closing the front center is ready. 
The finished roll is attached to the front right facing according to your button size. Pay attention to the markings in the pattern. 
Here you can see a detailed photo of the processed eyelet. 


Now sew the prepared front facing, right sides together, to the slit opening of the front piece. Pay attention to the notches and only stitch up to the previously sewn line. 
The front center is neatly ironed out, as is the turned-down slit in the front part. 
Now, finally, the front and back pieces can be sewn together at the side seams, right sides together. The seam allowances are neatened together and pressed to the back. 
The previously prepared hem of the front and back pieces is then stitched close to the edge. 
Now place your sleeves, right sides together, into the armhole. Finish the seam allowances together and press them into the sleeve. 
The back facing is sewn to the front facing, right sides together, and the seam allowances are ironed apart. 
Now you can stitch and secure the previously ironed cut edge of the facings with 0.8cm. 
The facings are placed, right sides together, at the neckline and stitched in place all the way around. The seam allowances must be clipped in place so that the neckline can be folded flat. 
 The seam allowances are then stitched flat, as far as possible. This method not only facilitates the final ironing but also ensures that the facing, if not stitched separately, will automatically tuck inward rather than roll out. Only the facing is stitched, close to the edge, onto the seam allowances. The stitching line is then visible only from the wrong side of the fabric, not from the right side.
Attach your button in the correct position. Pay attention to the marking in the cut. 
Finally, the facing is stitched all the way around to the front and back pieces.
Your SUVI is ready !
If you're stuck or have any questions, please email us at info@schnittmuster-berlin.de. We'll respond as soon as possible.
Have lots of fun with your new designer piece!
Sincerely, your Schnittmuster-Berlin team.