Sewing instructions fur vest Natascha
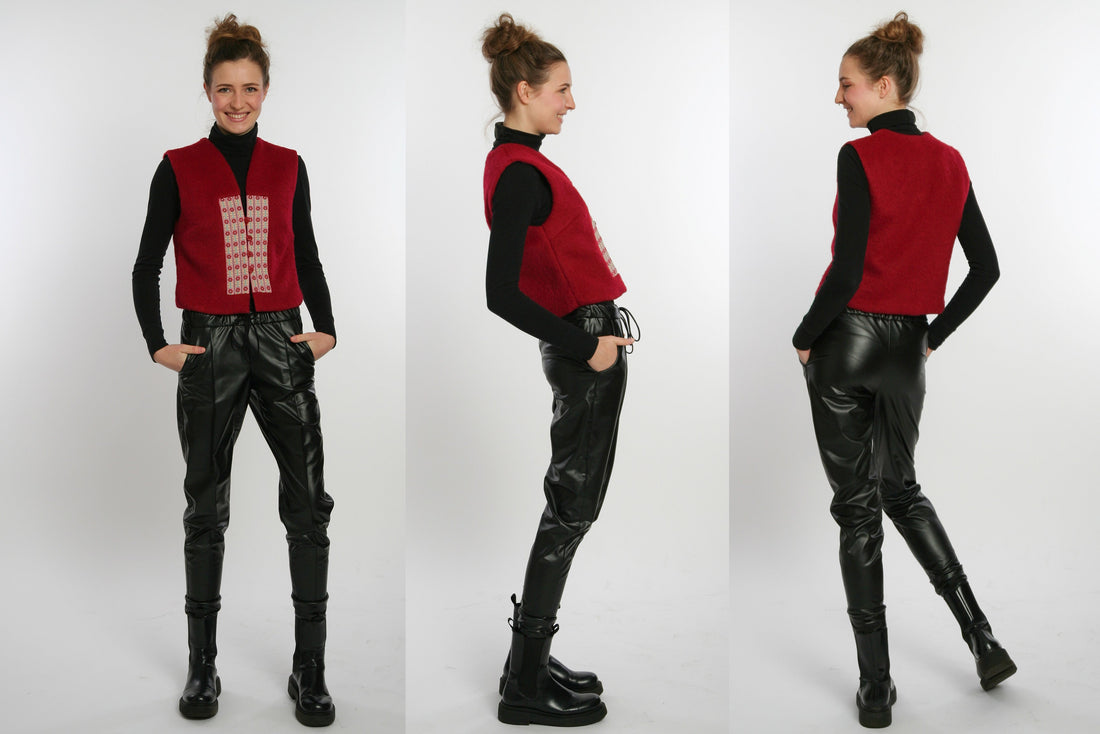
The Natascha waistcoat is very easy to work with, with lining all around, only the button placket made of contrasting fabric is a bit more sophisticated. We chose the tone-on-tone insert in smooth wool, but instead sewed on a colorful border of the right width - a really great effect! So your creativity is required here, everyone will definitely find colorful ribbons/borders in their sewing fund. Depending on the choice of fabric and border, the waistcoat looks rustic or folkloric.
Length at center back 46-54 cm
In these instructions, Natascha was sewn from artificial fur.
Required material:
We recommend a soft faux fur (long hair) or coarse knitwear and contrasting fabric for the button panel used (wool, knitwear).
Sizes 34-42
- Outer fabric 0.60m (140cm wide)
- Lining 0.60m (140cm wide
Sizes 44-50
- Outer fabric 0.70m (140cm wide)
- Lining 0.70m (140cm wide)
Sizes 34-50
- Fabric contrast 0.35m (140cm wide)
- Cord 0.30m approx. 5mm diameter
- Buttons 5 x 1.5cm in diameter
- Border 0.70 m, 6 cm wide
In advance for you as information:
cutting:
Cut out the pattern pieces from your outer and lining fabric. Lay the fabric right side up. Lay the selvedges parallel to the center so you can lay the back piece in the fabric and lining in the fold. The pattern pieces should all be face up. Always align the grain arrow on all pieces in the same direction and parallel to the selvage of the fabric. Transfer all the notches from the pattern through a 3mm long incision with scissors or chalk. Pinch the seam allowance in the fold of the fabric because this is always a center. Markings define positions of dart ends, pocket positions, etc. Transfer these either with chalk or pins.
If you want to make your Natascha out of corduroy, then note that corduroy is cut against the grain. We have a video for you about this.
If you want to make your Natascha out of checked fabric, Dagmar will show you the best way to cut out checked fabric in this video.

You need from fabric:
- 2x front part in opposite directions
- 1x back part in break
- 4x use in front of the same

From lining you need:
- 2x front part in opposite directions
- 1x back part in break


also with band:
- 2x front armholes
- 2x front part cutout
- 2x back armholes
- 1x back part cutout
Sewing instructions:
You will need a sewing machine to sew this vest.
In addition to the description, the colorful lines in the pictures show you where a seam needs to be sewn or something to be glued.
When sewing, pay attention to the seam allowance included in the pattern. Seam allowances that are not specially marked are 1 cm wide!
Happy sewing!

This is our border, consisting of quilted narrower decorative bands. These are fixed next to each other, so the straps cannot slip when sewn onto the insert.

Sew the prepared insert onto the front piece right sides together and cut in the corners.

A simple, straight dart is closed and sewn on the wrong side of the fabric, snap by snap, tapering from the widest point to the tip

Also sew a panel of outer fabric to the front piece of lining fabric.

Here you can see the sewn-in and ironed insert in the lining.

A simple, straight dart is closed and sewn on the wrong side of the fabric, snap by snap, tapering from the widest point to the tip

Sew five eyelets a foot's width onto the panel in the lining, right side of the body, according to the positions on the pattern. (In our pattern there are only 4 buttons)

Here you can see the sewn-on eyelets.

Now, right sides together, overturn the front edge of the lining and fabric front piece.

Also sew the neckline of the back parts of the lining and outer fabric right sides together. Snap a little on sharp curves.

Now you can close the shoulder seam in one go, right sides together, from the front and back pieces.


Place the lining fabric right sides together on the outer fabric and sew the armholes together all the way around.


Close the hems of the front and back pieces, right sides together, of the lining and outer fabric.

Sew the right side seam of the front and back pieces, right sides together. To do this, grab the side seams to be worked on through the back left side seam and sew them together.

Work the left side seam as far as you can get. A piece of the side seam in the lining remains open.

Here you can see a detail photo of the left side seam.

Close the opening in the lining with just the edges together.

Finally, you sew five buttons (four in our pattern) to the front edge and tie raised seam allowances through the lining and outer fabric: at the shoulder point, neckline shoulder point, armpit point and side seam hem.
Your NATASCHA is ready!
If you don't know what to do, or if you have any questions, please send us an email to info@schnittmuster-berlin.de. We will answer you as soon as possible.
Have a lot of fun with your new designer piece!
Sincerely, your Sewing Pattern Berlin team.
