Sewing instructions for high-waist trousers Ücke
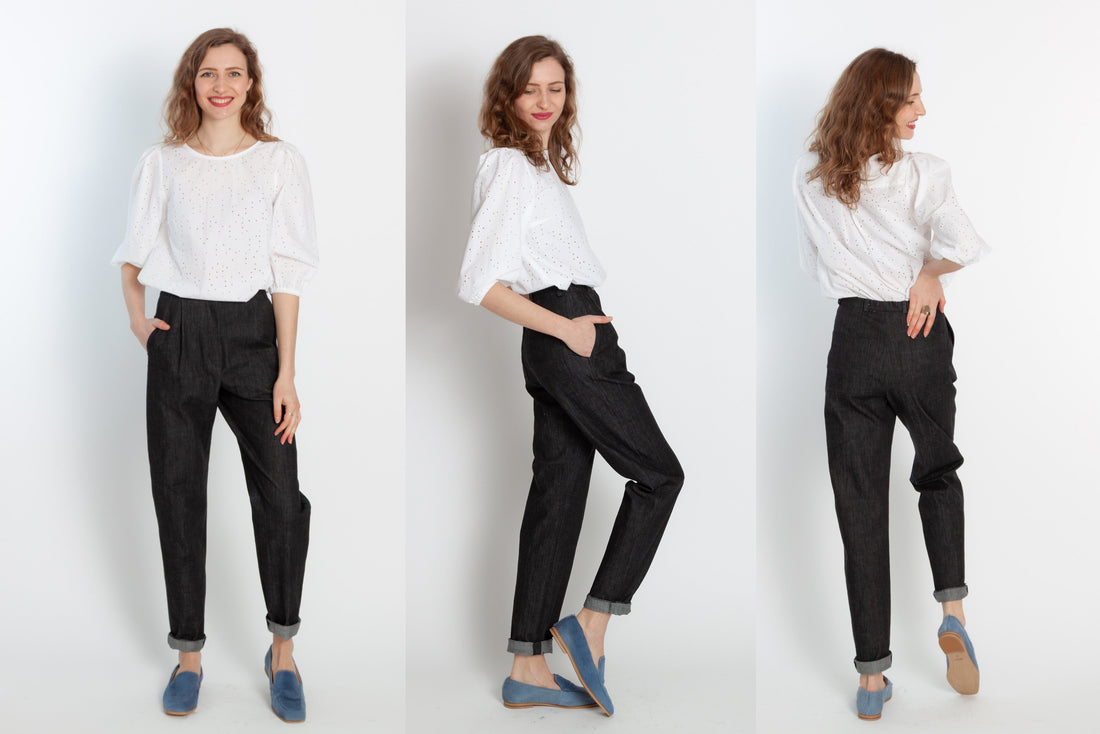
You can create this modern high-waisted trouser style using the Ücke sewing pattern. The jeans look is achieved through the slanted side pockets and decorative patch pockets. An elasticated waistband at the back and small pleats at the front provide added comfort.
The trousers are 108 cm long, including the waistband.
Ücke was sewn from an elastic denim fabric in this tutorial.
Just so you know in advance:
Materials needed:
We recommend a heavy and flowing fabric, e.g. soft denim with elastane.
Sizes 34-42
- Outer fabric 2.20 m (140 cm wide)
Sizes 44-50
- Outer fabric 2.50 m (140 cm wide)
Sizes 34-50
- Insert 0.10 m (90 cm wide)
- Rubber 0.35 - 0.50 m (3 cm wide)
- Button, 1 piece, 12 mm diameter
- Ripper, 1 piece, 17 cm long
Cut:
Seam allowances are included - 1cm wide or as indicated by the marking notches!
Cut out the pattern pieces from your outer fabric, lining fabric, and interfacing . Place the fabric right side up. The pattern pieces should all be lying with the printed side facing up. Always align the thread arrow on all pieces in the same direction and parallel to the selvedge of the fabric. Transfer all notches from the pattern by making a 3mm snip with scissors or using chalk . Snip the seam allowance on the fold, as this is always the center point. Markings define the positions of dart ends , pocket positions, etc. Transfer these either with chalk or pins . It's best to roughly cut out all outer fabric pieces that will be fully interfaced first. After you've secured the interfacing, cut them out precisely. There's also a video here about gluing and securing pattern pieces.
If you want to make your skirt from corduroy, please note that corduroy is cut against the grain. We have a video for you on this.
If you want to make your back from plaid fabric, please note that the pattern pieces for the pockets and the entire waistband should be cut on the bias.
Dagmar shows you the best way to cut plaid fabric in this video.


You will need the following fabric:
- 2x back pants, mirror images
- 2x front trousers, mirror images
- 1x belt loop
- 2x pocket bags, opposite each other
- 1x underpass
- 2x bottom rear pockets
- 2x back pockets


also with insert:
- 1x bundle
- 1x Top flap zipper

also with shaping tape:
- 2x pocket openings on pocket bag
Sewing instructions:
Seam allowances are included - 1cm wide or as indicated by the marking notches!
To sew these trousers you will need a sewing machine and an overlock sewing machine, or alternatively the zigzag stitch of your sewing machine to finish the cut edges.
If you're using an invisible zipper, you'll also need the appropriate presser foot for your sewing machine. The colored lines in the pictures, in addition to the written description, show you where to sew a seam or glue something.
When sewing, pay attention to the seam allowance included in the pattern. Seam allowances not specifically marked are 1 cm wide!
Have fun sewing!

Prepare the left front piece as follows: Cut away the overlap of the left side of the body along the line in the pattern and iron it according to the pattern.
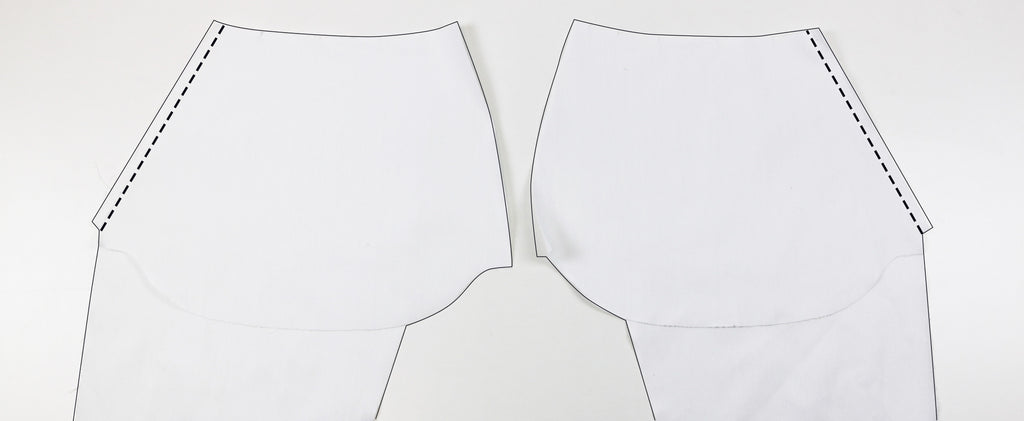
Start your trousers with the front pockets. To do this, place the pocket bags right sides together on the respective front trouser piece and stitch 1 cm from the edge. Press the seam allowances towards the bag to make it easier to turn it over later.

Here you can see the sewn pocket bags and the ironed top and underlap.

Fold the bags over and stitch the opening close to the edge and a step-foot width away.

Now place the pocket bags right sides together and stitch along the bottom edge. Pay attention to the notches in the pattern. Then finish the seam allowances together.

You can secure the front pocket with a 3cm long quilting stitch at the bottom and top, close to the edge and a presser foot's width from the pocket opening.

Now let's finish the edges of the cut pieces. Finish the prepared front pieces…

… the back panels,…

… the upper and lower edges of the rear pockets, the upper edge of the rear pocket at the bottom, the underlap and one long side of the belt loop.


Now prepare the back patch pocket by placing both pieces right sides together and sewing them together. Then press the finished seam allowances open.

You can flatten the seam allowances by topstitching close to the edge on both sides. I also recommend sewing a basting stitch with a long stitch around the curves of the pocket, as this will make them easier to press.
In this video we'll show you the best way to use the ironing template for the back patch pocket.

Now iron the seam allowances all around and turn under the pocket opening. Use the template provided in the pattern for this.

Stitch the pocket opening according to the pattern.

Now, place the prepared back pockets right sides together on the markings in the cut of the back trouser pieces and secure both pockets with a narrow seam all around, close to the edge and a presser foot width.

The front of the trousers is placed right sides together on the back of the trousers, and you close the side seam, which is then ironed open.

Prepare the hem according to the pattern and iron it.

Now let's move on to the inseams of the trouser legs, which are sewn together right sides facing. Use the notches in the pattern as a guide and slightly stretch the shorter section of the back of the trousers. Press these seam allowances open as well.

Next, you'll need to close the crotch seam. To do this, turn one pant leg right side out and the other pant leg wrong side out. Insert the pant leg (right side out) into the other pant leg. Pin the seat seam together so that it lies nice and straight, and sew a short section (see photo). Make sure that the inseams are perfectly aligned.
To better understand how to sew in your zipper and make all the necessary preparations beforehand, we have prepared a video for you here.

Take the zipper and the prepared facing. Sew the zipper onto the facing. Be careful not to stitch too close to the zipper track so the slider doesn't get caught later.

The ironed-over underlap is pinned and sewn to the left side of the body, along with the facing, on the zipper side.

To help you, place the front center sections together. This will make it easier to secure the other side of the zipper.

Lay the trousers neatly in front of you so that the fly overlap covers the zipper, and pin the overlap to the zipper. Then fold the sewn-on underlap to the side and sew the zipper through the overlap 2 cm (or 3 cm wide) from the center front fold. Finish approximately 2 cm above the end of the zipper and backstitch to secure the stitching.

Now stitch the decorative seam and secure the overlap while the underlap is folded away. Lock it just before the underlap begins.

Fold the underlap back under the zipper and stitch (depending on the design) in an arc or diagonally towards the front center onto the corner of the crotch seam through the overlap, zipper and underlap, then secure it at the crotch seam.

Now sew the remaining section of the seat seam right sides together and topstitch twice for double reinforcement. Press the seam allowances of the center back open up to the notch in the crotch.


When cutting out the belt loops, iron the raw edge over by 1 cm and the finished edge over by 1 cm. Finally, topstitch along each of the long sides with a 0.2 cm seam allowance. Cut the strip into 6 equal lengths.

Fold the pleats according to the pattern and secure them with a basting stitch the width of a presser foot.

Stitch your cut belt loops right sides together to the markings in the cut, close to the edge and 1.5cm below.

Now let's move on to finishing the waistband. Iron the waistband fold according to the pattern, wrong sides together. Then iron the seam allowance of the inner waistband under by 1 cm.

Now fold the waistband in half and sew a basting stitch with a large stitch directly next to the pressed edge of the inner waistband, onto the outer waistband.

Now sew the waistband to the pants, right sides together. Make sure to stitch to the left of the outer waistband's basting stitch. Press the seam allowances upwards. Also check that the waistband is at the correct height at the front when you close the zipper.

The short stretches of the federal government are slumped right on right.

Now we'll finish the tunnel in the back waistband, where the elastic will later be inserted. Topstitch the inner waistband in the shadow of the seam from side seam to side seam.

You can then pull the elastic into the tunnel at the correct length and secure it at the side seam.

Stitch the front waistband pieces close to the edge and a presser foot's width from the edge to the respective side seams.

Fold the belt loops upwards, check the desired length for a belt, fold over a 1cm seam allowance and baste it close to the edge. Also make the buttonhole on the right side of the body.

Fold the belt loops upwards, check the desired length for a belt, fold over a 1cm seam allowance and baste them close to the edge.

Sew on a matching button.
Your back is finished !
If you get stuck or have any questions, please feel free to contact us by email at info@schnittmuster-berlin.de. We will reply as soon as possible.
Have lots of fun with your new designer piece!
Sincerely, your Schnittmuster-Berlin team.