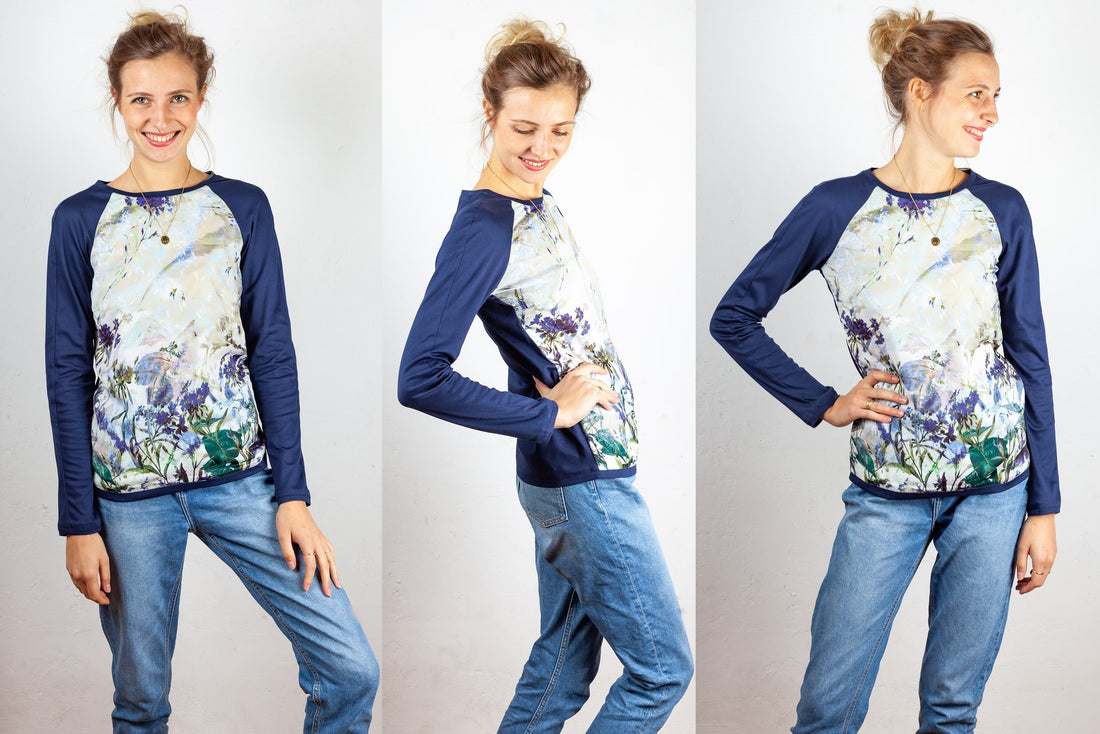
Sewing instructions Shirt Barbara
This is a classic cut for a long-sleeved shirt with raglan sleeves and is therefore also suitable for sewing beginners. Since the shirt can be patched from two fabrics, the classic cut is broken up and the long-sleeved shirt gets a modern and individual look.
Center back length = 60 - 68 cm
In these instructions, Barbara was sewn from viscose and viscose jersey.
Required material:
We recommend an elastic jersey and a viscose or silk fabric for patching. Info: If you want to use a jersey for both, it can happen that your shirt is a bit wider than specified on average.
Sizes 34-42
- Outer fabric 0.80 m (140 cm wide)
- Jersey 1.00 m (140 cm wide)
Sizes 44-50
- Outer fabric 0.80 m (140 cm wide)
- Jersey 1.50 m (140 cm wide)
cutting:
Cut out the pattern pieces from your fabrics . Lay the fabric right side up. Lay the selvedges parallel to the center so that you can lay the front and back pieces in the fold. Always align the thread up arrow on all pieces in the same direction and parallel to the selvage of the fabric. Transfer all the notches from the pattern through a 3mm long incision with scissors or chalk . Pinch the seam allowance in the fold of the fabric because this is always a center. Markings define positions of dart ends , pocket positions, etc. Transfer these either with chalk or a pin .

You need from fabric:
- 1x front part in break
- 1x back part in break
- 2x sleeves in front in opposite directions
- 2x sleeves back opposite
- 2x sleeve panel
- 1x neck baffle
- 1x hem panel
Sewing instructions:
To sew these shirts you need a sewing machine and an overlock sewing machine, alternatively you can use the zigzag stitch on your sewing machine to finish the raw edges.
Be sure to use a jersey needle and use a stretch stitch, i.e. if you are sewing with a home sewing machine you should use either a zigzag stitch or the tripartite elastic stitch and then all seam allowances again with a zigzag stitch or another appropriate stitch neaten so they don't fray. In addition to the description, the colorful lines in the pictures show you where a seam needs to be sewn or something to be glued.
When sewing, pay attention to the seam allowance included in the pattern. Seam allowances that are not specially marked are 1 cm wide!
Happy sewing!

A simple, straight dart is closed and sewn on the wrong side of the fabric, snap by snap, tapering from the widest point to the tip

Then sew the raglan sleeves to the front part, right sides together, and neaten the seam allowances together. Iron the seam allowances into the sleeves.

Sew the back sleeves to the back piece, right sides facing, and neaten the seam allowances. Iron the seam allowances into the sleeves.

Close the shoulder seam by placing the front and back pieces right sides together and sewing. Neaten the seam allowances together and iron them to the back.

Close the side seam with a seam allowance of 1.5 cm and overcast it. Then press the seam allowance backwards.

Close the neckline to form a round, right sides together, and iron out the seam allowances.

Then iron the neckline in a fold, left sides facing, so that you can insert them right sides together in the neckline. The shoulder seam is on the right side of the body. Note the snaps and pin the center front, center back and shoulder seam together.

When sewing in the jersey is slightly pulled. Seam the seam allowances together and iron them down.

You also secure the seam allowance with flat quilting.

You also sew the sleeve facings right sides together to form a round and iron the seam allowances apart.

Iron the sleeve facings left sides together in the fold and then insert them into the sleeves right sides together. The seam is on the underarm seam. Pin the two together.

When sewing in the jersey is slightly pulled. Everything is closed with 1cm and the seam allowances are neatened together. You iron the seam allowance upwards...

... and secure it with a topstitch close to the edge.

Close the hem band right sides together to form a round and iron the seam allowances apart.

Iron the hem panel left sides together in a fold, then place them right sides together on the hem. The seam is on the left side of the body.

When sewing in the jersey is slightly pulled. Everything is closed with 1cm and the seam allowances are neatened together. Iron the seam allowance upwards...

... and secure it with an extra topstitching just under the edge.
Your BARBARA is ready !
If you don't know what to do, or if you have any questions, please send us an email to info@schnittmuster-berlin.de. We will answer you as soon as possible.
Have a lot of fun with your new designer piece!
Sincerely, your Sewing Pattern Berlin team.
