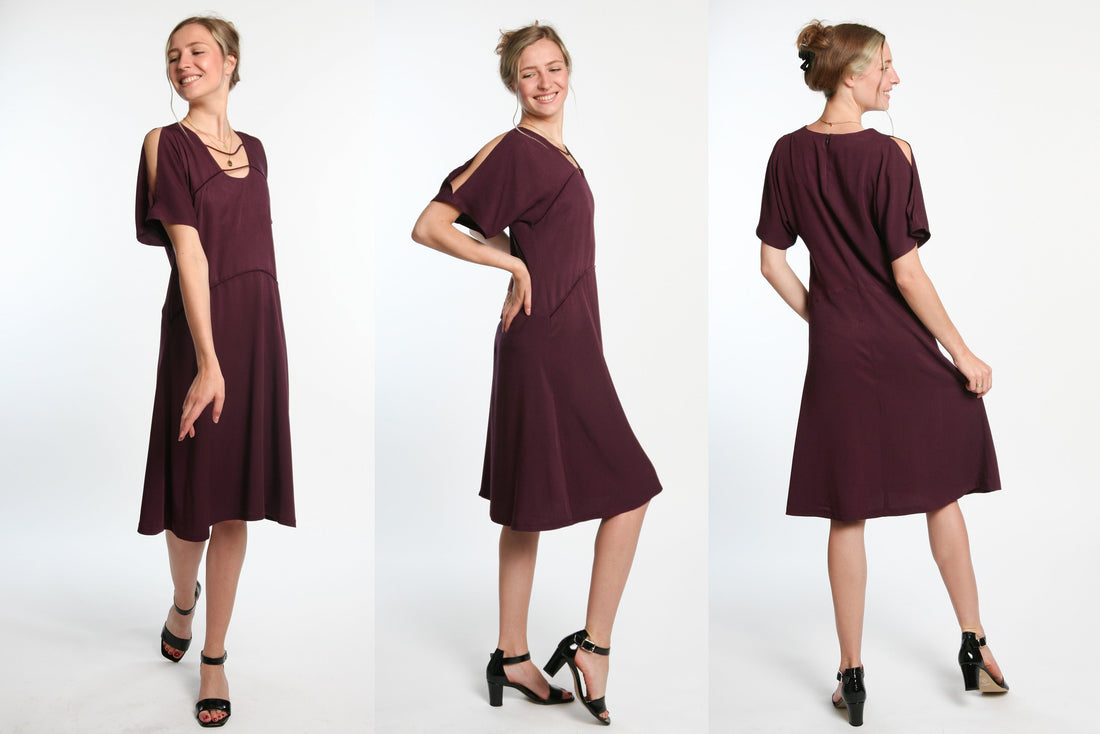
Sewing instructions summer dress Finola
Our summer dress Finola convinces with an unusual cut and beautiful details. The A-shaped dress casually swings slightly due to the flared hem. The oversized sleeves and the wide neckline sit nicely and loosely. The colored piping at hip and chest height are additional eye-catchers and emphasize the special lines.
Length at center back = 92 - 98 cm
In these instructions, Finola was sewn from a viscose crepe.
Required material:
We recommend a flowing, opaque viscose.
Sizes 34-42
- Outer fabric 2.00m (140cm wide)
Sizes 44-50
- Outer fabric 2.30 m (140 cm wide)
Sizes 34-50
- Seam ripper 1 x 60 cm long
- Insert 0.35 m (90 cm wide)
- Form tape 2.00 m 12 mm wide
piping tape
- Size 34 + 36 = 0.95 m
- Size 38 + 40 = 1.05m
- Size 42 + 44 = 1.15m
- Size 46 - 50 = 1.30m
cutting:
Cut out the pattern pieces from your outer fabric and interlining. Lay the fabric right side up. Lay the selvedges parallel to the center so that you can place the front center, bottom and front facing in the fold. The pattern pieces should all be face up. Always align the grain arrow on all pieces in the same direction and parallel to the selvage of the fabric. Transfer all the notches from the pattern through a 3mm long incision with scissors or chalk. Pinch the seam allowance in the fold of the fabric because this is always a center. Markings define positions of dart ends, pocket positions, etc. Transfer these either with chalk or pins. It is best to first roughly cut all outer fabric parts that are completely covered with an interlining. After you have fixed the insert, cut it out exactly. There is also a video about gluing and fixing pattern pieces here.


You need from fabric:
- 2x front part-top in opposite directions
- 1x front part in the middle of the break
- 1x front part below in the break
- 2x upper back part in opposite directions
- 2x lower back part in opposite directions
- 1x Volume 1 in the oblique FDL
- 1x Volume 2 in the oblique FDL

also with insert:
- 1x document front part in break
- 2x cover back piece in opposite directions


also with band:
- 1x Neckline on front and back facings after they are sewn together
- 2x position of the zipper in the center back after the back parts have been connected
Sewing instructions:
You will need a sewing machine to sew this dress.
If you use a zipper, you also need the right presser foot for your sewing machine. In addition to the description, the colorful lines in the pictures show you where a seam needs to be sewn or something to be glued.
When sewing, pay attention to the seam allowance included in the pattern. Seam allowances that are not specially marked are 1 cm wide!
Happy sewing!

Sew the bottom and top of the back piece right sides together and neaten the seam allowances. Then iron the seam allowances upwards.
Now iron the forming tape for the zipper position to the center back.

Fasten the center back of both back pieces, right sides together, from the hem to the bottom snap, which is the end of the zipper.

Overcast the seam allowances of the zipper edge individually, but sew the closed center back together up to the hem. Press the center back seam allowance to the right side of the body.

Now you sew in the seam-concealed zipper. Use the right sewing foot to help you.

Measure the length of the finished piping on the pattern and stitch it to the dividing seams of the upper front parts.

Again, measure the length of the piping for the center front piece on the pattern and pin it to the dividing seam. Why we recommend this step: The dividing seam of the front part is in the diagonal direction of the grain, so the stretch stretches much more easily. If you were to sew the piping down the length of the center front piece, the entire length would not match the length of the bottom skirt. This way you can stick to the extended route again and the routes will fit together later.

Sew the center front piece to the bottom piece right sides together and neaten the seam allowances. Then iron the seam allowances down.

Now sew the upper front pieces to the middle front piece, right sides together, neaten the seam allowances and iron them down.

So that the neckline doesn't stretch out too much because it was also cut diagonally, stitch an auxiliary seam the width of a stitching foot all the way around.

Neaten the seam allowances of the front...
... and the back shoulder seam separately.

Now cut the ribbons and process them into rolls.

Trim the finished ribbons to the correct length of the track on the cut. Due to the sloping grain, the tapes stretch when they fall and must be cut again accordingly.
Here is a video on how to best process a solid roll.

Stitch the finished ribbons to the notches in the neckline of the front part, right sides together. The ribbons will later lie between the lining and the front part.

Sew the side seam right sides together and neaten the seam allowances. Then iron them backwards.

Now neaten the hem of your dress all around.

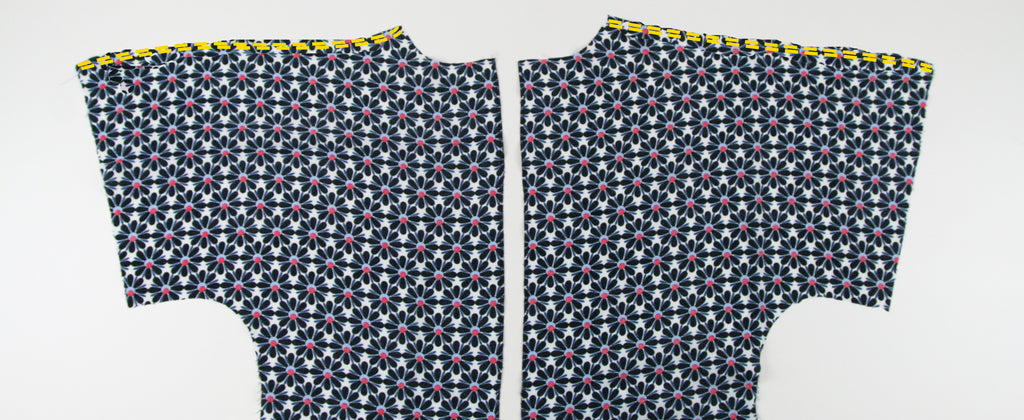
Sew the shoulder seams right sides together from the sleeve hem to the first snap and from the second snap to the neckline. Iron the seam allowances apart and fold over the seam allowances of the shoulder opening by 1 cm.

Stitch the opening of the sleeve all around the width of a stitching foot.

Here you can see a detailed view of the left sleeve.

Place the facings right sides together and close the shoulder seam. Iron the seam allowances apart...
...and the shaping tape on the inner stretch of the neckline.

Then neaten the outer cut edge of the receipt.

Fold over the trimmed edge of the facing by 1cm and stitch it in place with a stitching foot.

You process the short stretches of the slip right sides together with the zipper. You can now pin the receipt to the neckline of the dress, right sides together, and stitch it in place. Maintain the slightly extended stretch of the front piece.


Secure the finished sewn and ironed-in slip through the shoulder seam with a small bar.

Iron the sleeve hems according to the pattern and topstitch them.

Before you finish the hem, check the final length of the skirt and possibly even out the sides if they sag a bit.
Finally, you also iron the hem of the skirt and stitch it through.
Your FINOLA is ready !
If you don't know what to do, or if you have any questions, please send us an email to info@schnittmuster-berlin.de.
We will answer you as soon as possible.
Have a lot of fun with your new designer piece!
Sincerely, your Dagmar and Ellen.
