Sewing instructions beach dress Miaka
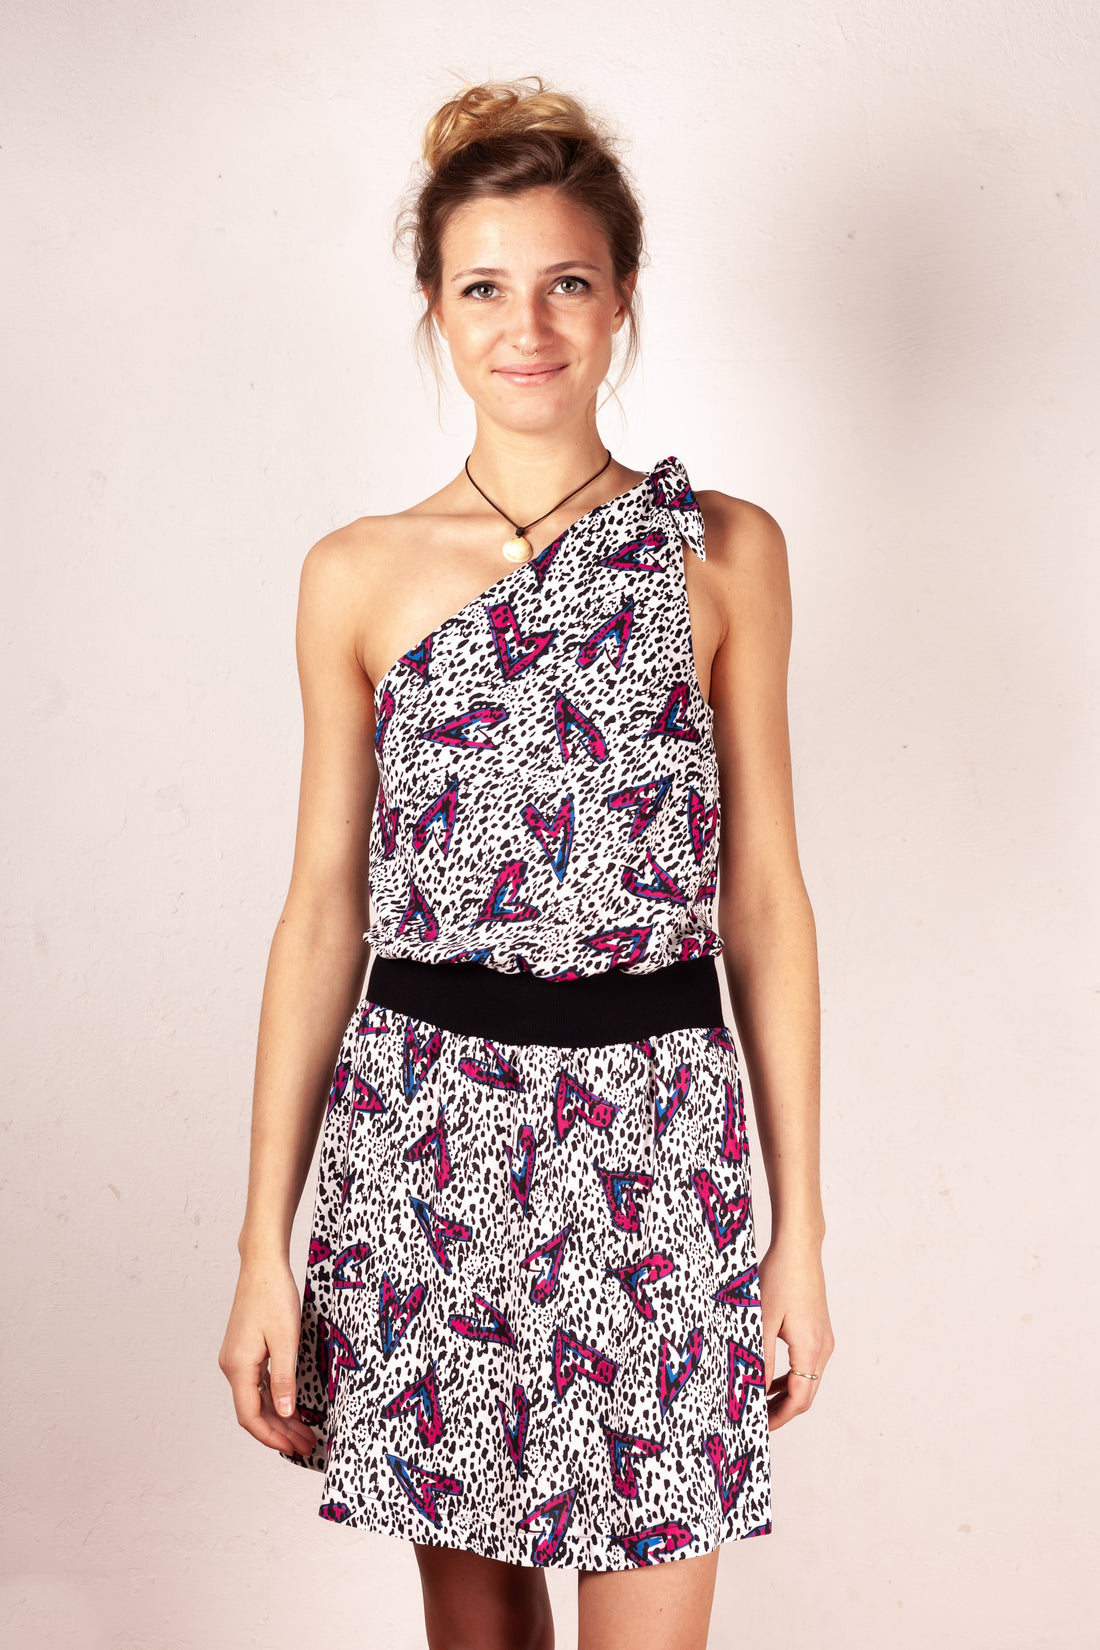
The Miaka dress has a cheeky and casual look, held in place only by the knot on the left shoulder, but otherwise it sits comfortably and casually. The elastic jersey strip at the waist gives the dress good support and creates a slim silhouette for the wearer. Simply stretch the top and bottom of the dress along the narrow strip and sew it on – done! The above-the-knee length is perfect for showing off your legs.
Skirt length = 48 – 52 cm
In this tutorial, Miaka was sewn from a light viscose and jersey.
Required materials:
We recommend a soft, flowing viscose fabric and cuffs/rib or jersey with elastane.
| Size 34-40 | Material | 1.70 m | 140 cm wide |
| Size 42-46 | Material | 2.40 m | 140 cm wide |
| Size 34-46 | Cuffs/rib | 0.10 m | 140 cm wide/
70 cm in the hose |
Cutting:
Seam allowances are included - 1cm wide or as per marking clips!
Cut the pattern pieces from your outer fabrics. Lay the fabric open with the right side facing up. The pattern pieces should all be placed with the lettering facing up. Always align the grain arrow on all pieces in the same direction and parallel to the selvedge of the fabric. Transfer all notches from the pattern by making a 3mm cut with scissors or chalk. Note that bust darts are required for sizes 42-46. 


 You will need fabric:
- 1x front part
- 1x back part
- 2x skirt part
You will need the following from cuff fabric/rib:
- 1x waistband
Sewing instructions:
Seam allowances are included - 1cm wide or as per marking clips!
To sew this dress, you will need a sewing machine and an overlocker. Alternatively, you can use your sewing machine's zigzag stitch to neaten the raw edges. Use a jersey needle or a fine sewing needle (size 70) to match your fabric selection. The colored lines in the images, in addition to the description, show you where to sew a seam. When sewing, pay attention to the seam allowance included in the pattern. Seam allowances not specifically marked are 1cm wide.
Have fun sewing!  It's best to start with the skirt piece. Sew the side seams together, right sides together, and neaten the seam allowances. Finish the hem edge and press it 2 cm according to the pattern. Topstitch the hem at 1.7 cm.
  Stitched hem.
  Neaten the bottom edge of the facing, which will later be folded inwards.
Please note that a dart is required starting from size 42! To do this, place notches on top of notches and sew to the dart point, which is marked by a drilled hole.  Now fold the facing inwards along the fold line on the front and back pieces, right sides together, and turn over the armhole and strap.
  Clip the seam allowance. This will make it lie more neatly when turned inside out.
  Stitch the facing seam of the armhole of the front and back pieces flat onto the seam allowance from the wrong side (as far as possible).
  This is what the armhole looks like from the inside with the quilting. It's only visible there.
  Sew the side seams together with the inner facings (open), right sides together. Make sure the front and back armhole seams meet. Then neaten the seam allowances together.
  Sew the side seam of the waistband together, right sides together, and neaten. Sew the waistband to the top, right sides together. Pin the waistband seam to the side seam and the other notches to the front, back, and hem. Stretch the waistband while sewing to fit the top.
  Neaten the seam allowances together.
  The top is already attached to the waistband. Now all that's missing is the skirt.
  Pin the skirt piece to the bottom of the waistband again using the notches. Stretch the waistband to the desired length in the same way. Neaten the seam allowances together.
  Finally, attach the facing to the inside of the seam allowances.
Your MIAKA is ready!
If you are stuck or have any questions, please feel free to contact us by email at info@schnittmuster-berlin.de. We will respond as soon as possible.
Have lots of fun with your new designer piece!
Sincerely, your Schnittmuster-Berlin team.