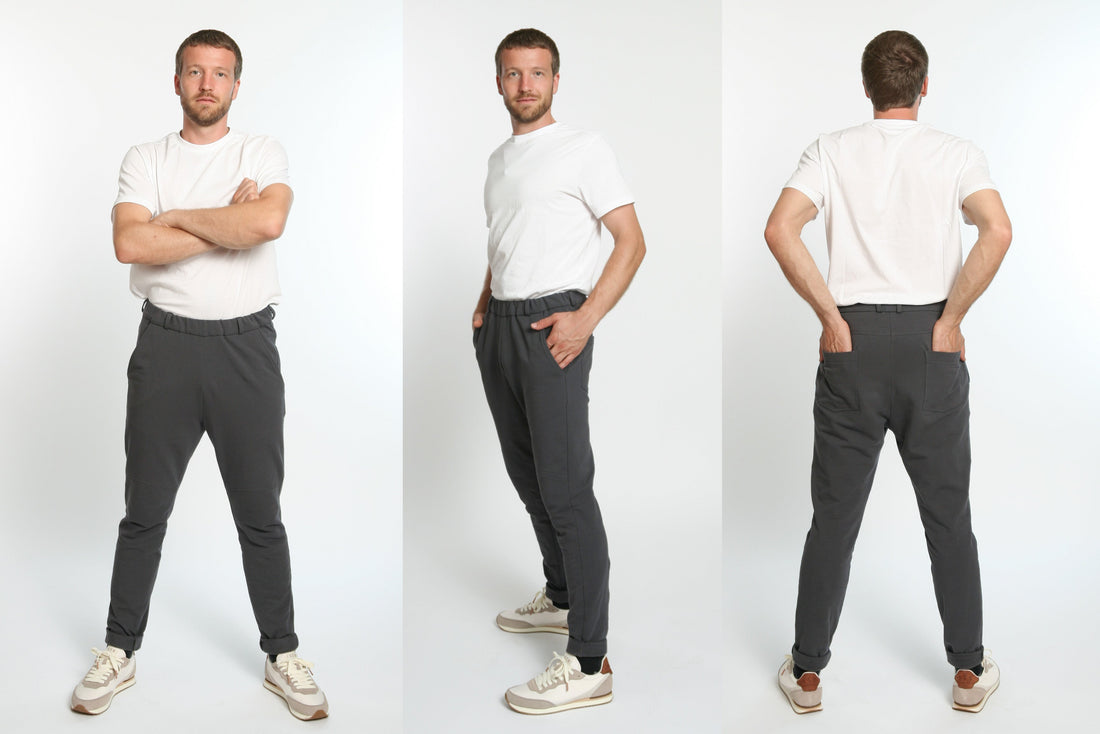
Sewing instructions sweatpants Karl
Share
Do you like to sew for men? Whether man, son, friend or brother, the sweatpants are really cool and casual. The elastic waistband ensures comfort and is easy to sew, the inserted knee patches ensure the modern look.
Inside leg length = 79 - 86 cm
Karl was sewn from a soft sweat fabric in this pattern.
Required material:
We recommend a slightly heavier sweat.
Sizes 44-50
- Outer fabric 1.65 m 140 cm wide
Sizes 52-58
- Outer fabric 1.95 140cm wide
Sizes 44-58
- Elastic band 96-113 cm, depending on size, 3cm wide
- Form tape 0.40 m 12 mm wide
cutting:
Cut out the pattern pieces from your outer fabric. Lay the fabric right side up. Lay the selvedges parallel to the center so that you can lay the back piece on the fold. The pattern pieces should all be face up. Always align the grain arrow on all pieces in the same direction and parallel to the selvage of the fabric. Transfer all the notches from the pattern through a 3mm long incision with scissors or chalk. Pinch the seam allowance in the fold of the fabric because this is always a center. Markings define positions of dart ends, pocket positions, etc. Transfer these either with chalk or pins.
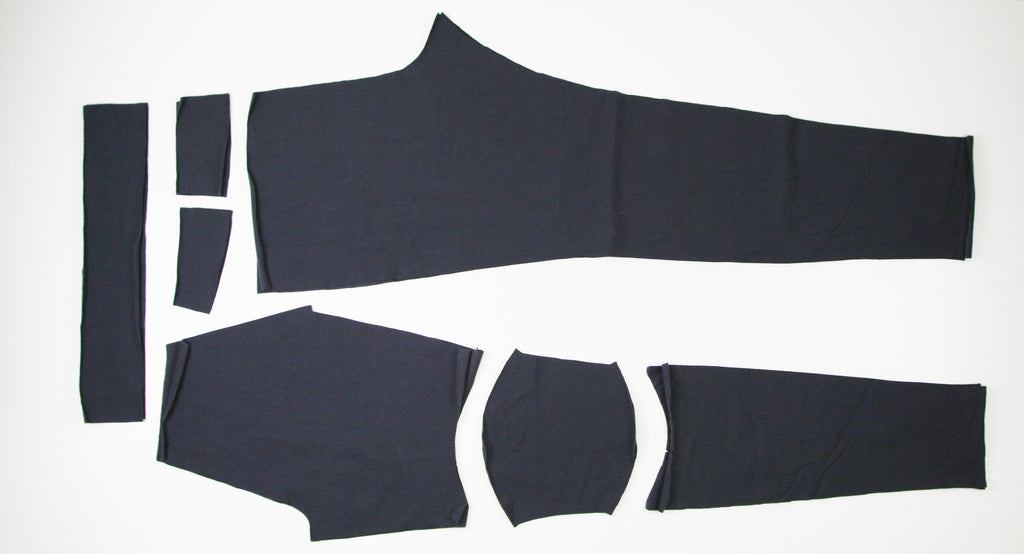

You need from fabric:
- 1x bundle in break
- 2x yoke-middle opposite
- 2x yoke side in opposite directions
- 2x hind trousers in opposite directions
- 2x front trousers at the top in opposite directions
- 2x front pant inserts at the front in opposite directions
- 2x front trousers below in opposite directions
- 2x belt loops
- 2x pocket bags in opposite directions
- 2x back pocket in opposite directions

also with band:
- 2x engagement pocket pouches
Sewing instructions:
To sew these pants you need a sewing machine and an overlock sewing machine, alternatively you can use the zigzag stitch on your sewing machine to finish the raw edges.
Be sure to use a jersey needle and use a stretch stitch, i.e. if you are sewing with a home sewing machine you should use either a zigzag stitch or the tripartite elastic stitch and then all seam allowances again with a zigzag stitch or another appropriate stitch neaten so they don't fray.
In addition to the description, the colorful lines in the pictures show you where a seam needs to be sewn or something to be glued.
When sewing, pay attention to the seam allowance included in the pattern. Seam allowances that are not specially marked are 1 cm wide!
Happy sewing!
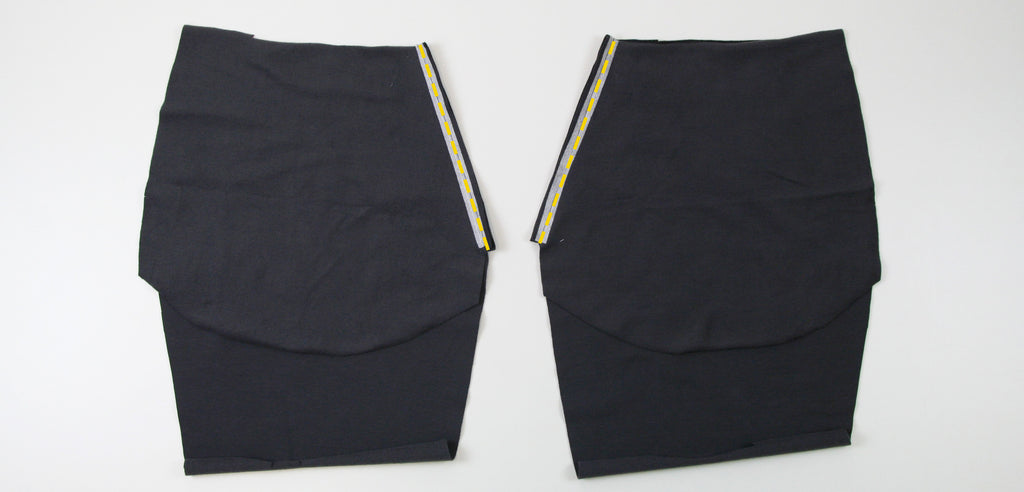
Sew the pocket pouches to the upper front trousers, right sides together.
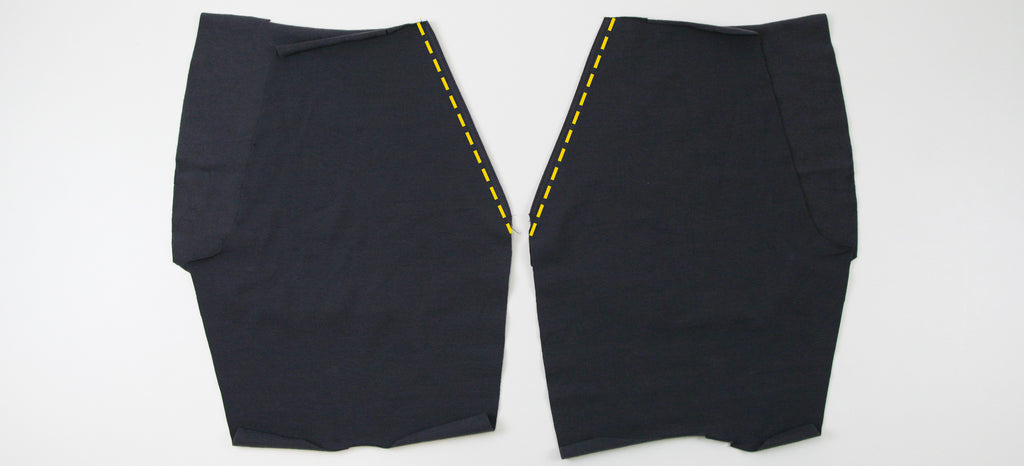
Iron the pocket bag inside out and stitch through the opening just under the edge and a stitching foot wide.

Fold the pocket pouches together, right sides together, stitch the pouches together at the bottom and neaten the seam allowances.
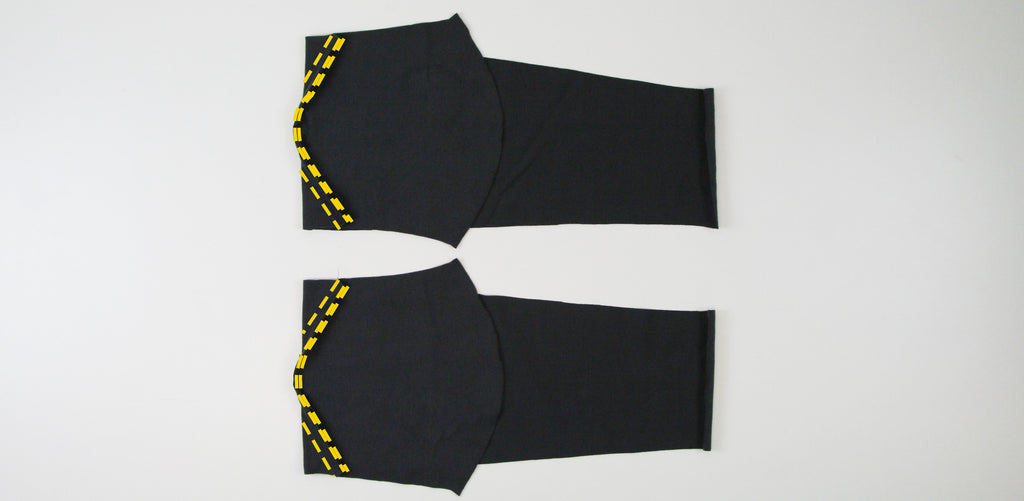
Stitch the front pant insert to the lower front pant, right sides together, neaten the seam allowances and then iron them down.

Now you can also sew the upper part of the front trousers to the insert, right sides together, neaten the seam allowances together and iron them upwards.

Stitch the seam allowances close to the edge and the width of your stitching foot.

Now take the hind pants and process the dart.
A simple, straight dart is closed and sewn on the wrong side of the fabric, snap by snap, tapering from the widest point to the tip (so that the dart does not bag) on the wrong side of the fabric, following the exact transfer of the pattern and carefully observing the marking. Draw a line with the tailor's chalk beforehand so that you don't sew too much or too little.
So that you don't have to bartack at the top, you can sew the last centimeter with a very small stitch. Iron the dart content towards the center back.

Take the back pockets and clean up the fly.

Iron the bag all around according to the pattern.

Step up the procedure...

... and position the pockets according to the pattern on the hind trousers. Stitch each one close to the edge and the width of a stitching foot.

Neaten the dividing seams of the center and side yokes individually.

Stitch the yokes right sides together and iron the seam allowances apart.

Pin and stitch the prepared yoke to the hind trousers, right sides together. When pinning, make sure that the dividing seam and the dart meet exactly. Overcast the seam allowances and iron them up.

Stitch along the seam allowance just under the edge and stitch-foot wide.

The front and rear trousers are prepared and can be closed right sides together at the side seam. Neat the seam allowances together and press them to the back.

Sew the inner leg seams together, right sides together, neaten the seam allowances and iron them to the back.

Put one leg right sides together into the other and close the seat seam. Neat the seam allowances together.

Now come to the preparation of the belt loops. For this you clean up one of the long sides...

and iron in the unfinished side and the finished side on top. Then stitch the belt loops right through the edge.


On the section you will find the markings for the positions of the belt loops. Lay one piece on the trousers, right sides together.

Iron the waistband in the upheaval...
 and stitch it right sides together into a round. Make sure to leave an opening for the elastic. Iron the seam allowances apart.
Finish the raw edge of the inner waistband.

Place the outer waistband right sides together on the trousers and stitch both together. Press the seam allowances up into the waistband.

The inner waistband is fixed in the shadow of the seam.

Now stitch the belt loops to the outer waistband.

You can now pull the rubber band through the small opening in the center back of the waistband with a safety pin.

Stitch the elastic together.

Finally, iron the previously trimmed hem upwards and stitch it through the edge.
Your KARL is ready!
If you don't know what to do, or if you have any questions, please send us an email to info@schnittmuster-berlin.de. We will answer you as soon as possible.
Have a lot of fun with your new designer piece!
Sincerely, your Dagmar and Ellen.

