Sewing instructions for the Estelle biker jacket
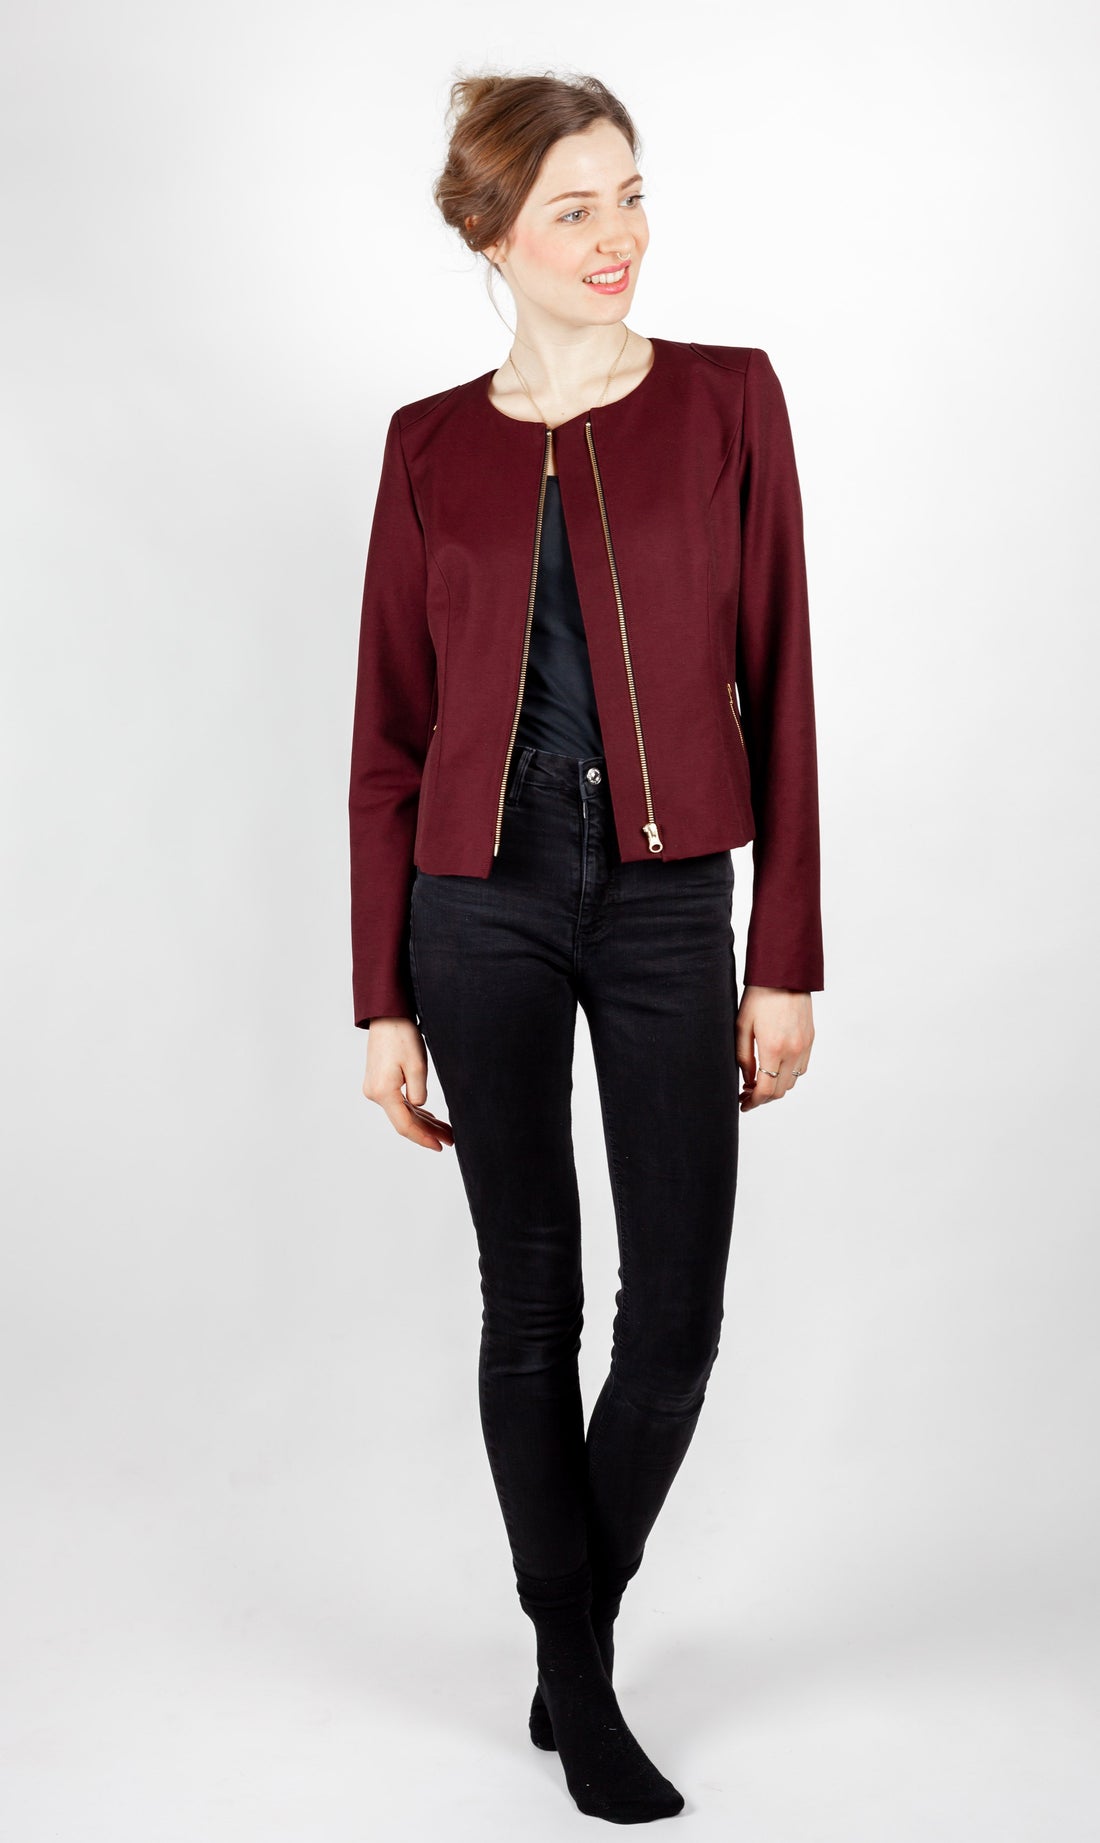
Our biker jacket requires some sewing experience. But it's worth the effort, as this cool jacket is a real eye-catcher and can be combined with a variety of outfits. The shoulder pads and dividing seams are beautiful details and emphasize the slim, feminine shape of the jacket .
Length in the center back = 49 – 55 cm
In this tutorial, Estelle was sewn from a stretch wool blend.
Required materials:
We recommend a Romanit, a wool blend or soft faux leather.
| Sizes 34-42 | Outer fabric | 1.50 m | 140 cm wide |
| Sizes 44-50 | Outer fabric | 2.00 m | 140 cm wide |
| Sizes 34-42 | feed | 1.30 m | 140 cm wide |
| Sizes 44-50 | feed | 1.40 m | 140 cm wide |
| Sizes 34-42 | insert | 1.10 m | 90 cm wide |
| Sizes 44-50 | insert | 1.20 m | 90 cm wide |
| Sizes 34-50 | pad | 1 pair | straight edge, thin |
| Sizes 34-50 | Cotton wool | 2 stripes | 5 cm x 30 cm |
| Sizes 34-40 | Zipper pockets | 2 x | 12 cm long |
| Sizes 42-44 | Zipper pockets | 2 x | 13 cm long |
| Sizes 46-50 | Zipper pockets | 2 x | 14 cm long |
| Sizes 34-36 | Zipper at the front | 1 x | 43 cm long tlb. |
| Sizes 38-42 | Zipper at the front | 1 x | 45 cm long tlb. |
| Sizes 44-50 | Zipper at the front | 1 x | 50 cm long tlb. |
| Sizes 34-50 | Forming tape | approx. 2 m | 12 mm wide |
Cutting:
Seam allowances are included - 1cm wide or as per marking clips!
Cut out the pattern pieces from your outer fabric, lining fabric, and interfacing. Lay the fabric right side up. Place the selvedges parallel to the center so you can place the underlap, back lining, and facing on the back fold. The pattern pieces should all be laid with the writing facing up. Always align the grain arrow on all pieces in the same direction and parallel to the selvedge of the fabric. Transfer all notches from the pattern by making a 3mm cut with scissors or chalk. Notch the seam allowance on the fold, as this is always the center. Marks define the positions of dart ends, pocket positions, and much more. Transfer these either with chalk or pins. It's best to roughly cut all outer fabric pieces that will be completely covered with interfacing first. After you have secured the interfacing, cut it out precisely. There is also a video here about gluing and securing pattern pieces.

You will need fabric:
- 1x undercut in the break
- 2x rear side panel opposite
- 2x back part opposite
- 2x pocket bags opposite
- 2x upper sleeves opposite
- 2x undersleeves opposite
 also glue the hems with interfacing:
- 2x back part
- 2x rear side panel
- 2x upper sleeves
- 2x undersleeves
 also with insert:
- 1x receipt at the back of the break
- 2x shoulder straps opposite
- 2x pocket receipt opposite
- 2x front receipt opposite
- 2x side panel front opposite
- 2x front part opposite
 You will need from food:
- 2x upper sleeve lining opposite
- 1x back lining in the fold
- 2x undersleeve lining opposite
- 2x pocket bag lining opposite
- 2x front lining opposite
- 2x side panel back lining opposite
- 2x side panel-front lining opposite


You will need from insert:
- 2x back part adhesive
- 2x front part adhesive

also with forming tape:
- Neckline facings at the back
- Neckline facings front
- Armholes side panels front
- Shoulders front parts
Sewing instructions:
Seam allowances are included - 1cm wide or as per marking clips!
To sew this jacket you will need a sewing machine and an overlock sewing machine, or alternatively the zigzag stitch on your sewing machine to neaten the cut edges.
In addition to the description, the colored lines in the pictures show you where a seam needs to be sewn or something needs to be glued.
When sewing, pay attention to the seam allowance included in the pattern. Seam allowances not specifically marked are 1cm wide!
Have fun sewing! 
Start your sewing with the sleeves. Sew the left upper sleeve and the left lower sleeve together, right sides together. Then iron the seam allowances open. 
The inner arm seam is also closed and the seam allowances are ironed open. 
Iron the hems of the sleeves using the notches. 
The back pieces are sewn together at the center back, right sides together. Then iron the seam allowances open. 
Then you can attach the side pieces to the prepared back piece. Here, too, the seam allowances are ironed open. 

Now let's move on to the zippered pockets on the front. To do this, place the facing pocket, right sides together, on the front piece. Pay attention to the markings in the pattern. Note: If the outer fabric is particularly thick, the facing pocket can also be cut from the lining and interfacing. This way, the thicker fabric won't show through. Please note that you should check the pocket window length against the zipper length; the zipper length may need to be adjusted. 
Now the middle can be cut open. The process is similar to making a piping pocket. A cut is made in the middle of the rectangle and a triangle is cut at both ends. 
Now you can turn the facing inside out. 
This is what your finished pocket window looks like from the wrong side of the fabric. 
The pocket zipper can now be positioned under the pocket window and stitched all the way around, as seen from the right. 
Finished pocket window with zipper from the right side of the fabric. 
To make the pocket window a proper pocket, all that's missing are the pocket linings. The lining lining is first stitched to the facing, right sides together... 
...and 
Place the outer fabric pocket pouch, right sides together, against the facing and stitch it in place. Make sure to sew as close to the zipper opening as possible. This is best done with a half-stitch presser foot. 
Both bags are sewn together and you have a finished pocket bag. 
Now let's move on to the lining. The back side panel is sewn together, right sides together, with the back piece... 
… the front side panel with the rear side panel and… 
… the front part with the side part in front. 
Sew the shoulders together, right sides together, according to the pattern, and then iron them back. 
Next, we'll move on to the back piece. There's a lining pleat at the center back. Fold the back piece over the fold and sew the width of the pleat about 2 cm up and down from the edge, then secure it. Press this pleat in one direction all the way to the hem. 

Sew the right upper sleeve to the right lower sleeve, right sides together, and also close the inner sleeve seam. However, leave an opening of approximately 20 cm on the left sleeve so that the hem can be closed through this opening later. Press the seam allowances open. 
Turn both lining sleeves right side out and insert them into the previously prepared body. Make sure the side seams and notches line up. Press the seam allowances into the sleeve. The lining can be set aside for now. 
In the next steps, we'll show you how to easily shorten a metal zipper. First, measure the length of the pattern and transfer the exact length to your zipper. 
To shorten the slider, pull out the oversized prongs from the top with pliers. Note that the first prong must be saved after bending and then reattached later to prevent the slider from sliding upward. 

The zipper can now be sewn into the front pieces. Use the notches in the pattern as a guide. 
The zipper underlap is folded, right sides together, and stitched along the short sides. 

The zipper underlap is inserted between the front facing and the front piece of the left side of the body. You can also secure it with a large stitching beforehand to prevent unnecessary slippage. Note the notches in the pattern and the exact position of the underlap under the zipper. 
Finished underlap on the left side of the body. 
On both front pieces, the facings are sewn and ironed inward. Make sure the hem edges are the same length at the bottom and iron the hem. 
Then the side piece with the integrated pocket is sewn to the prepared front piece and the seam allowances are ironed open. 
In order to sew the epaulettes onto the shoulder seam, they must be closed, right sides together, and the seam allowances must be ironed open. 
For the epaulettes, it's best to use our prepared ironing template and iron the seam allowances of the curve. To ensure the seam allowances fit neatly into the curve, they need to be cut. 
The epaulettes are fixed and pinned into the correct position… 
… and stitched close to the edge. 
The front facings on the front piece are sewn to the back facing, right sides together… 
...and then sew it together at the neckline of the back and front pieces. Trim the seam allowances neatly so the curves fit nicely. 

Close the torso by sewing the side seams of the front and back pieces together, right sides together. Press the seam allowances open. 
Before sewing the sleeve into the body, you should add a stitch to prevent the arm length from stretching out when worn. To do this, sew a stitch within the seam allowance from the notch to the double notch. Next, sew the sleeve into your jacket, right sides together. Make sure the side seams and the notches line up. The seam allowances are pressed into the sleeve. 
The wadding is worked into the armhole within the seam allowance. 
Decide for yourself whether you need extra padding for your shoulders. Some shoulders fill the armhole particularly well and don't need any extra support, as is the case with our model. We used only wadding for better shaping. Nevertheless, we'll show you how to best attach a shoulder pad here: Center the padding along the shoulder seam. Pin the short side with a short piece inside the shoulder seam allowance, and the long side completely inside the armhole seam allowance. 
Now comes the lining. Place the lining into your jacket as it will look when sewn in, but with the right side of the lining facing the right side of the fabric. Now sew the lining along the facing edges.
The seam allowances of the facing and lining are ironed flat into the body.
To make feeding easier for you, we have a video for you here.

Next, sew the sleeve lining to the sleeve hem. To prevent it from twisting, we first push the lining properly into the sleeve and pin it to the hem. Only then do we pull the sleeve out and fold the rest. 
Then, grab the seam allowance of the lining armhole at shoulder seam height and sew it together with a strip of lining (approx. 3-4 cm long), leaving about 3 cm of slack for the lining. Then sew the strip to the outer fabric in the same position.
The seam allowances under the armpit of the lining and fabric are held together with a bartack. 
Now you can close the hem. To do this, leave a gap in the middle so that you don't have to turn the entire jacket through the armhole. 
Sew the remaining hem by reaching through the armhole and pulling out the still open hem to sew it up. 
Now all you have to do is sew the armhole in the lining close to the edge and your jacket is finished.
Have lots of fun with your new designer piece!
Sincerely, your Schnittmuster-Berlin team.