Sewing instructions for the Joina blouse
The Joina blouse was created in collaboration with Johanna, aka joina215 . Johanna has been a member of our design sewing group for a long time and continually inspires us with her wonderful sewing examples. A while ago, she went public with a remarkable article. In it, she talks about her serious, still little-researched illness, Myalgic Encephalomyelitis/Chronic Fatigue Syndrome, or ME/CFS for short. We spontaneously decided to launch this blouse project with her.
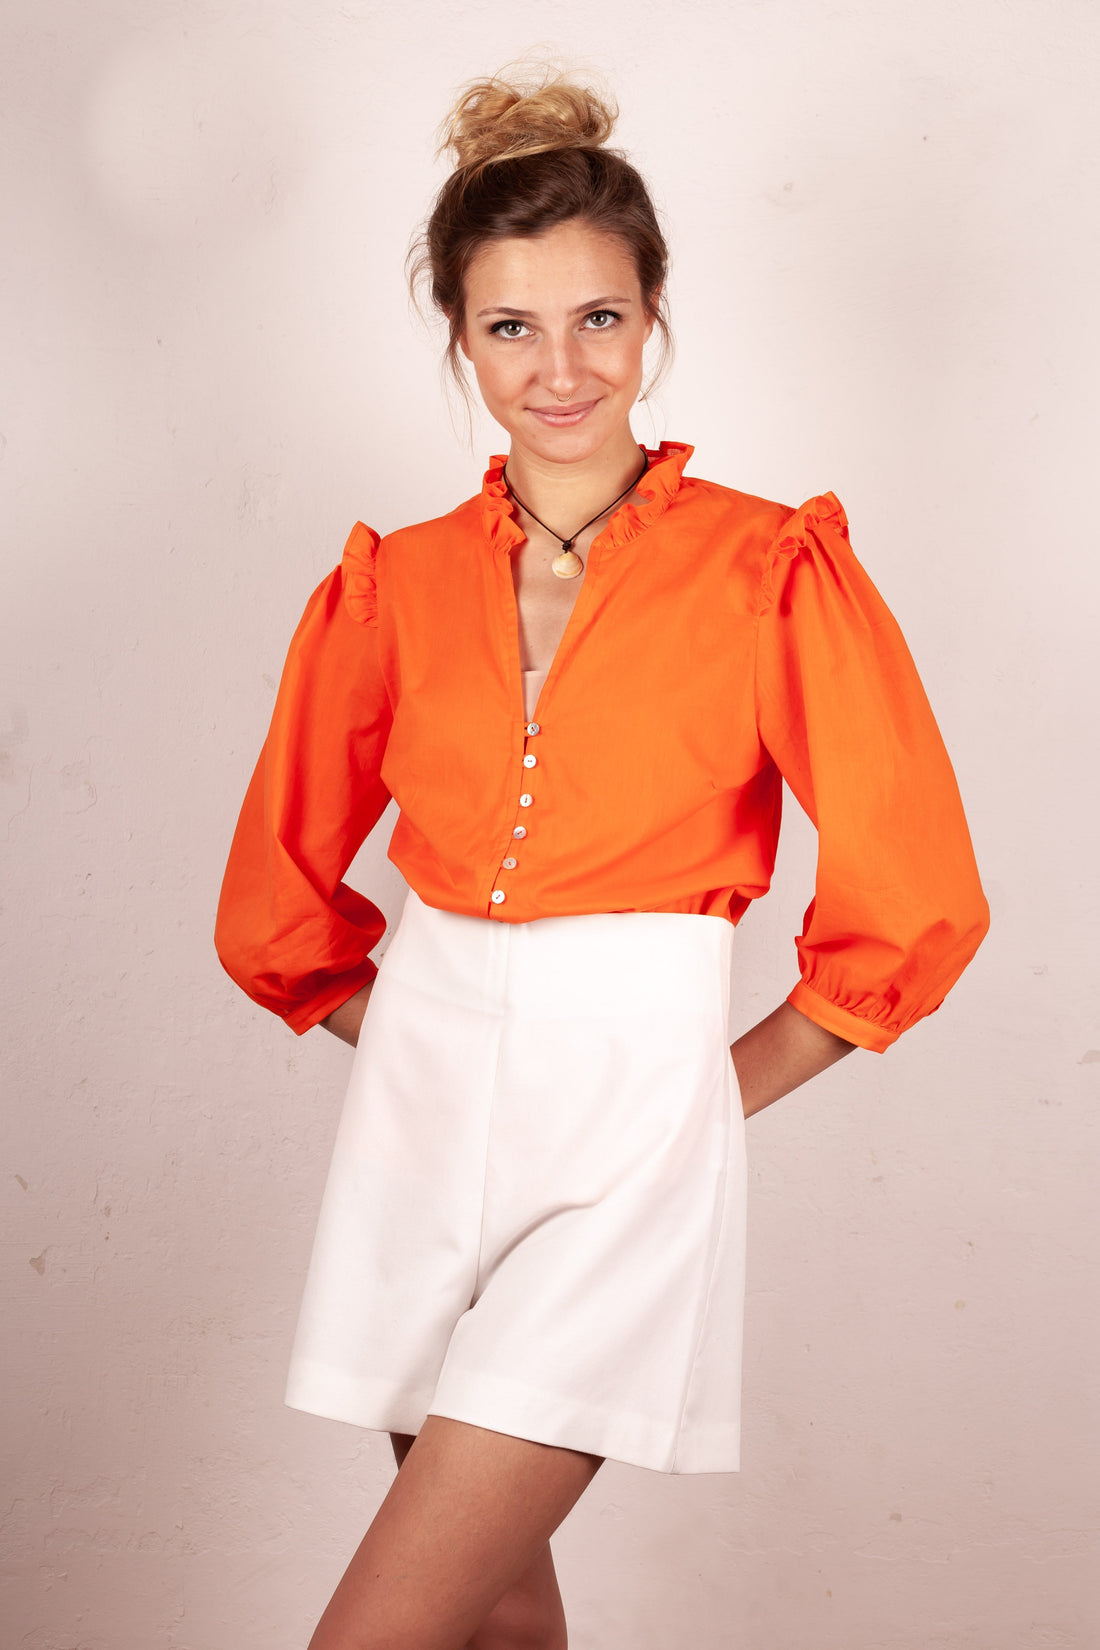
Johanna has created a romantic blouse with ruffle details on the collar and armhole. The body is loosely cut and has a straight hem. The wide puff sleeves are 3/4 length, and the narrow cuffs and front edge are closed with loops and buttons. This requires some practice, but it fits the style of the blouse perfectly.
Length in the center back = 62 – 68 cm
Joina was sewn in this tutorial from a light cotton fabric.
Required materials:
We recommend a flowing silk, viscose or thin cotton fabric.
| Sizes 34-42 | Outer fabric | 1.60 m | 140 cm wide |
| Sizes 44-50 | Outer fabric | 2.10 m | 140 cm wide |
| Sizes 34-50 | insert | 0.30 m | 90 cm wide |
Cutting:
Seam allowances are included - 1cm wide or as per marking clips!
Cut out the pattern pieces from your outer fabric and interfacing . Lay the selvedges parallel to the center so you can place the back piece, yoke, neck ruffle, and sleeve ruffles on the fold. The pattern pieces should all lie with the writing facing up. Always align the grain arrow on all pieces in the same direction and parallel to the selvedge of the fabric. Transfer all notches from the pattern by making a 3mm snip with scissors or chalk and mark the ends of the darts. Notch the seam allowance along the fold, as this is always the center. It's best to roughly cut all outer fabric pieces that will be completely covered with interfacing first. After you've secured the interfacing, cut it out precisely. There's also a video here on gluing and securing pattern pieces.

 You will need fabric:
- 1x back part in the fracture
- 2x back yoke in the fold
- 1x neck ruffle in the fold
- 2x sleeve ruffles in the fold
- 2x front part opposite
- 2x band front edge/ cover
- 2x sleeves opposite
- 2x slit strips
- 1x strip for eyelets
 also with insert:
- 1x receipt at the back of the break
- 2x receipt front
- 2x cuff
Sewing instructions:
Seam allowances are included - 1cm wide or as per marking clips!
To sew this blouse you will need a sewing machine and an overlock sewing machine, or alternatively the zigzag stitch on your sewing machine to neaten the cut edges.
In addition to the description, the colored lines in the pictures show you where a seam needs to be sewn or something needs to be glued.
When sewing, pay attention to the seam allowance included in the pattern. Seam allowances not specifically marked are 1cm wide!
Have fun sewing! 
There are two ways to close the center front of a blouse. One is with a button placket, as shown in the photo. The second option involves sewing the seam up to the top button notch. We'll explain in more detail, with additional photos, how the second option works in the lower part of the post.
There are two ways to finish the sleeve hem. Either with a classic cuff and slit or with a drawstring and elastic. Choose one and you're ready to go. I'll describe and illustrate both options. 
Variant 1: Cuff with slit
Start by creating the slit. To do this, place the slit strip, right side of the sleeve, on top of the right side of the strip. Place both under your sewing machine and start with a 0.7 mm topstitching that tapers to the top of the cut slit (see photo). 
The slit strip is ironed over, folded over twice and stitched through from the right side, close to the edge. 
The upper corner of the slit is fixed with a diagonally upward seam. 
Now the slit can be finished and ironed to close the correct side. The top photo is of the right arm, as a guide, since a slit can always be opened backwards. The ironed edge can be stitched to the hem to help. 
Fold the upper sleeves as marked on the pattern. Make sure to notch the seams correctly. 
Now close the sleeve seam and neaten the seam allowances. These are then ironed back. 
Attach the cuff to the hem of the sleeve. To do this, iron one open edge (on the side where the eyelet will be attached) over 1cm. 
The strip for the cuff eyelet, cut on the bias, is placed right sides together in the fold. Starting at the top with the seam, leaving a wider opening (like a school cone), shrink it and topstitch to the fold at the width of the stitching foot. Using a thick thread and a large needle, the roll can be pulled through. Push the blunt end of the needle into the opening and pull the seam allowances through.
For the eyelets, you can also watch our sewing video for the pulled-through roll.
Attach an eyelet to the cuff. Pay attention to the notches in the pattern. The photo above shows the cuff of the left sleeve. Then, iron the cuff in the fold (i.e., centered), wrong sides together.


Using a large stitch, you can create the gathers on the sleeve. Make sure you add 2 cm to the length of the cut cuff. In this video, we'll show you how to create ruffles, or, for this blouse, gathers.

Now, with the unpressed edge right sides together, the cuff can be stitched 1cm to the sleeve hem. Leave 1cm at each end for the slit edges to be turned together (see next photo). Carefully iron the cuff down. 
Turn the ends or the overlap and underlap of the cuff together, right sides together, and fold the fold together. 
Sew the cuff onto the sleeve from the outside (right side of the fabric) close to the edge and close everything. 
This is what the finished sewn cuff looks like from the inside and outside of a right sleeve. 
Place your button so that the slits line up nicely and the cuffs overlap slightly.
Variant 2: Drawstring with elastic
If you prefer the sleeve to have an elastic band, you must not cut the slit as marked in the pattern! 
Fold the upper sleeves as marked on the pattern. Make sure to notch the seams correctly. 
Now close the sleeve seam and neaten the seam allowances. These are then ironed back. 
The sleeve hem is double-pressed. First, press 0.5 cm, then 1 cm , and then sew it into a tunnel, close to the edge. Make sure to leave a small opening for the elastic to pass through. Pull the elastic through and sew the ends together. Then close the opening again. 
Here you can see what the sleeve looks like with the elastic in the drawstring at the end. 

Now let's move on to the back piece. Sew a seam from notch to notch using a long stitch length. This will allow you to gather this area. To define the total length, use the length of the yoke as a guide. 


The strip, cut on the bias, is placed right sides together in the fold. Starting at the top with the seam, leaving a wider opening (for a school cone), shrink it and topstitch to the fold at the width of the stitching foot. Using a thick thread and a large needle, the roll can be pulled through. Push the blunt end of the needle into the opening and pull the seam allowance through.
For the eyelets to close the blouse, you can also watch our sewing video for the pulled-through roll.

Divide the entire long ribbon into 10 smaller pieces, for the entire cuff (2) and front closure (8). When determining the length of each eyelet, consider the size of your buttons. 
At this point, you have to decide how to finish the center front. If you want to stick with the button placket, just read on. However, if you want to close the blouse with a seam, skip this sewing step and other photos that explain how to finish the button placket. You can find the photos at the end of the pattern.
Now place eight of the cut rolls along the front edge and stitch them in place with a stitching line the width of your stitching foot. Note the notches marked in the pattern for the position of the eyelets. The other two eyelets have already been used in the sleeves. 
Now let's move on to the ruffles on the sleeves. To do this, the outer side of the ruffle is double-folded by 0.5 cm, ironed over, and topstitched close to the edge. 
Here you can see the topstitched seam, marked in yellow. We also sewed the inner side with a large stitch and created the gathers. To determine the total length of the ruffle, measure the length marked on the pattern. 
The finished ruffle can now be placed, right sides together, against the armhole and secured with a stitch. Make sure to follow the notches marked on the pattern. 
The neckline ruffle is made in the same way as the armhole ruffle. To do this, the outer side of the ruffle is double-pressed 0.5 cm and topstitched close to the edge. Additionally, we sewed the inner side with a large stitch and created the gathers. 
The finished ruffle can now be placed, right sides together, against the neckline and secured with a stitch the width of your quilting foot. Make sure to leave a 1 cm seam allowance at both ends for the front edge. 
Here you can see a detailed photo of how the ruffle looks sewn in. 
Now let's move on to the facing of the front and back pieces, secured with interfacing. Sew the shoulder seams, right sides together, with a 1cm seam allowance and press them open. The outer edge is ironed over 0.5cm and topstitched close to the edge to ensure a neat finish. 
Place the facing, right sides together, over the neckline created with the ruffle and pin the shoulder seams, center back, and front edge to secure. Stitch everything in place with 1cm stitches. To ensure the facing fits properly on the inside of the blouse, notch the curves of the neckline. Then carefully iron the facing, wrong sides together, to the inside. 
The facing is then attached to the body with a close-edged topstitch. Sew from the right side of the fabric. This way, the neck ruffle will stand upright when you put the blouse on. 
Then, stitch the facing through the shoulder seams from the outside. Sew in the shadow of the shoulder seam so it's less visible. 
Skip the next 4 photos if you want to close the center front with a seam and scroll all the way down to work on the center front before closing your side seams, working on the hem, and setting in the sleeves.
Now let's move on to the strip for the front edge, a so-called facing. This is ironed, wrong sides together, in the fold... 
...and sewn to the front edge, right sides together, up to the hem, using the stitching foot. The fixed eyelets are located between the front piece and the facing strip. 
The facing is ironed inward and folded over so that the eyelets are visible. It is then stitched to the front piece, 1 cm from the front edge. 
A detailed photo shows how the panel looks when sewn in and how the front part is neatly finished. 
Now you can sew the side seams of the front and back pieces, right sides together, and neaten the seam allowances together. Press these to the back. 
The hem is folded over twice and stitched close to the edge. Pay attention to the notches in the pattern. 
Now let's insert the sleeves. Place the correct sleeve, right sides together, into the correct armhole, paying attention to the notches marked on the pattern. Neaten the seam allowances together. 
Finally, the sleeve ruffles are neatly pinned to ensure they stand out well. To achieve this, the sleeve seam allowance should point toward the body, so the seam (shown in yellow) is stitched close to the edge from the beginning of the ruffle to the end. 
Skip this photo if you want to close the center front with a seam.
Finally, sew on the buttons according to the loops. When sewing on the buttons, make sure they are positioned within the 1cm wide panel.
Here I begin with the detailed processing of the front center with seam: Please note that this is a minimized sample piece and therefore only the bare essentials (front, neck facing and facing) have been cut out so that we can explain this variant to you quickly and subsequently. 
The top notch is the only notch made at the center front. This determines your neckline length. Then, neaten the center front seam allowance up to your marked notch. 
Both front pieces are now joined together, right sides together, with a seam up to the notch and a 1cm seam allowance. 
The seam allowance can now be ironed open. 
The aperture is shortened. First, I transferred the length of the notch from the front piece to my aperture. Next, we decided on a distance of 6 cm from the notch and trimmed the aperture. You can also choose a shorter distance. 
Both strips are ironed, wrong sides together, in the fold. 
Place the facing with the raw edge, right sides together, against the neckline and stitch in place up to the notch using the stitching foot. Make sure the neckline is already turned and the facing needs a 1cm seam allowance at the top for a neat finish. Repeat this process on both sides of the neckline. 

The facing can now be folded inward and then ironed flat. The upper seam allowance is first folded under the facing and tucked into the seam. The seam (see photo) is then stitched from the outside, the width of the stitching foot, and the facing is then sewn in place. 
The end of the panel also needs to be neatly finished. To do this, we ironed both bottom edges 1cm over... 
… and stitched to the respective seam allowance from the inside.
Your JOINA is ready !
If you are stuck or have any questions, please feel free to contact us by email at info@schnittmuster-berlin.de. We will respond as soon as possible.
Have lots of fun with your new designer piece!
Sincerely, your Schnittmuster-Berlin team.