You will need the following fabric:
Sewing instructions for Winnie blouse
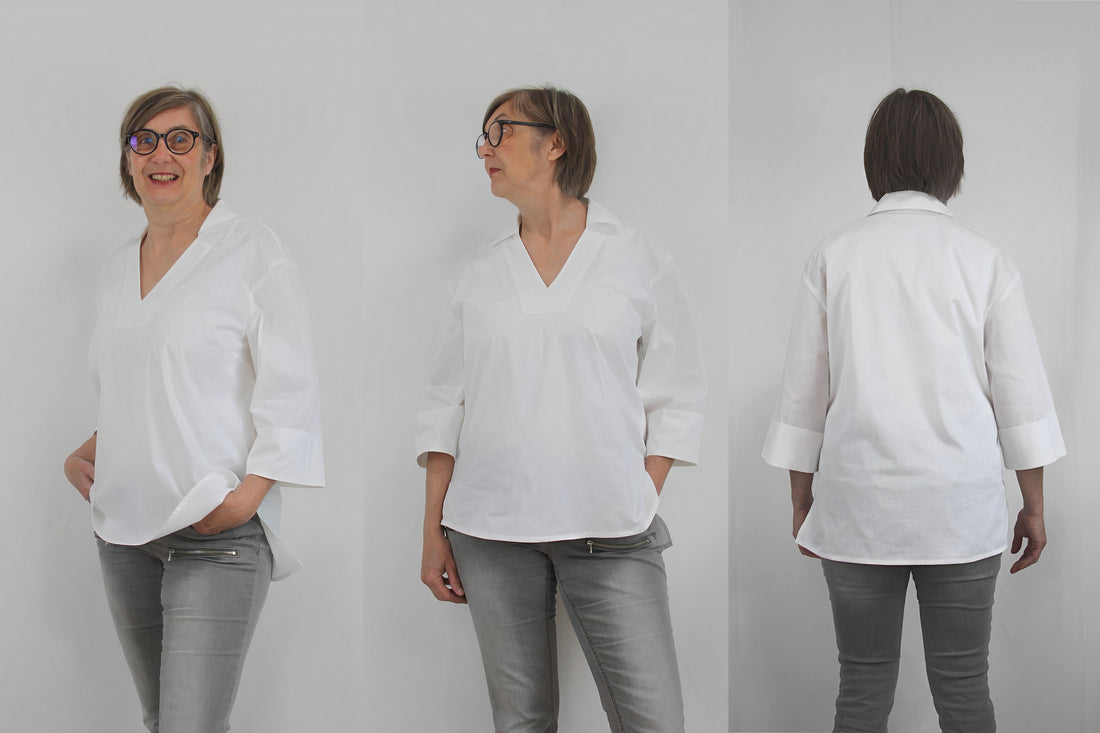
As a slight contrast to our blouses with ruffles and statement sleeves, our new Winnie shirt blouse has a very minimalist and clean look. The V-neck with its blouse collar and the boxy shape create a very casual look and offer plenty of freedom of movement.
Length at back center = 72 cm
Winnie was sewn from a lightweight cotton fabric in this tutorial.
→ To the "Winnie" sewing pattern
Materials needed:
We recommend cotton, thin linen or silk.
Sizes 34-42
- Outer fabric 1.70 m (140 cm wide)
Sizes 44-50
Outer fabric 1.80 m (140 cm wide)
Sizes 34-50
Insert 0.60 m (90 cm wide)
Forming strip 0.80 m
Cut:
Seam allowances are included - 1cm wide or as indicated by the marking notches!
Cut out the pattern pieces from your outer fabric. Place the fabric right side up. Align the selvedges parallel to the center so you can lay the back and front pieces on the fold. All pattern pieces should be placed with the printed side facing up. Always align the grainline arrow in the same direction on all pieces and parallel to the selvedge of the fabric. Transfer all notches from the pattern by making a 3mm snip with scissors or using chalk, and mark the ends of any darts. Snip the seam allowance on the fold, as this is always the center point. Markings define the positions of dart ends, pocket positions, etc. Transfer these either with chalk or pins.


- 1x back piece in half
- 1x front part in breakage
- 2x sleeves, mirrored

and additionally with insert
- 1x undercollar
- 1x upper collar
- 1x receipt at the front of the break
Possibly a support band
With a soft fabric, you can reinforce the back neckline and front neckline on the facing with bias tape.
Sewing instructions:
Seam allowances are included - 1cm wide or as indicated by the marking notches!
To sew this blouse you will need a sewing machine and an overlock sewing machine, or alternatively the zigzag stitch of your sewing machine to finish the cut edges.
The colored lines in the pictures show you, in addition to the description, where to sew a seam or glue something.
When sewing, pay attention to the seam allowance included in the pattern. Seam allowances not specifically marked are 1 cm wide!
Have fun sewing!


Then you iron the dart filling upwards.

Sew the shoulder seam right sides together, finish the edges together and press towards the back.

Then finish the side seams and sleeve seams...

Sew the side seams together right sides facing up to the beginning of the slit/notch, paying attention to the width of the seam allowance.

Iron the side seam open, including the part of the slit.

Iron the hem according to the pattern; the back piece is longer than the front piece.

Fold the hem over twice and stitch it down.

Stitch the slit 1cm wide, also stitch across the side seam.

Turn the upper and lower collars right sides together, noting that the upper collar is slightly larger; this extra width needs to be incorporated. Then trim the seam allowances, including the corners. (Topstitch the collar seam as flat as possible.)

Turn the collar inside out and iron it, then sew both layers together at the open seam using a basting stitch.

Sew the collar into the neckline from notch to notch, then neaten the seam together.

Finish the front facing at the shoulder seams and iron the three outer edges over by 1cm.

Turn the fabric right side out, ensuring a clean point in the center front. (You may want to mark it beforehand.)

Trim the seam allowances and clip them at the point. Then press the neckline seam open, then flat. Topstitch the facing close to the edge onto the front piece, pinning it in place. Finally, press.

Now iron the sleeve hem according to the pattern...

Iron the sleeve cuffs as well.

Sew the sleeve seams together right sides facing, then press the seam open.

Fold the cuff up and over as before ironing, then pin the hem on the inside of the sleeve, making sure there is enough roll width.

Stitch the hem edge close to the edge. (Only with the sleeve, not with the cuff) Fold up the cuff and iron.

Finally, sew the sleeves into the armhole according to the markings and neaten the seam allowance together.
Your Winnie is finished!
If you get stuck or have any questions, please feel free to contact us by email at info@schnittmuster-berlin.de. We will reply as soon as possible.
Have lots of fun with your new designer piece!
Sincerely, your Schnittmuster-Berlin team.