Sewing instructions sheath dress Konstanze
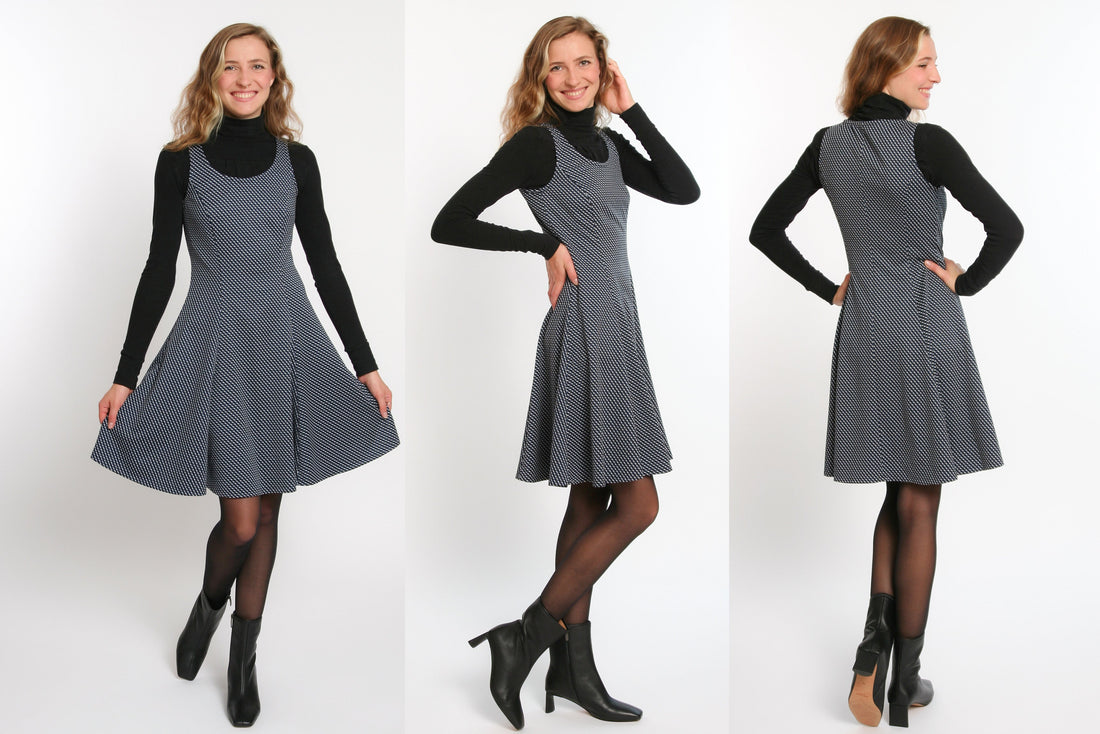
The basis of the Konstanze dress pattern is a simple sheath dress with princess seams. These emphasize the body shapes and make a beautiful figure. The large round neckline conjures up a great décolleté, the wide, swinging skirt takes the austerity out of the dress and makes it appear rather playful. Dress Konstanze is an all-round beautiful dress, just right for every occasion.
Length at center back = 88 - 94 cm
Konstanze was sewn from a jacquard stretch in this pattern.
Required material:
We recommend an opaque fabric with some body such as cotton or taffeta as the dress is unlined.
Sizes 34-42
- Fabric 2.20 m (140 cm wide)
Sizes 44-50
- Fabric 2.60 m (140 cm wide)
Sizes 34-50
- Seam ripper 1x 35 cm long
cutting:
Cut out the pattern pieces from your outer fabric. Lay the fabric right side up. Lay the selvedges parallel to the center so that you can lay the front piece on the fold. The pattern pieces should all be face up. Always align the grain arrow on all pieces in the same direction and parallel to the selvedge of the fabric. Transfer all the notches from the pattern through a 3mm long incision with scissors or chalk. Pinch the seam allowance in the fold of the fabric because this is always a center. Markings define positions of dart ends, pocket positions, etc. Transfer these either with chalk or pins.


You need from fabric:
- 1x front part in break
- 2x side part-front opposite
- 1x neck band in the diagonal grain line
- 2x armhole tape in the diagonal grain run
- 2x back part in opposite directions
- 2x side part-rear in opposite directions
Sewing instructions:
You will need a sewing machine to sew this dress.
In addition to the description, the colorful lines in the pictures show you where a seam needs to be sewn or something to be glued.
When sewing, pay attention to the seam allowance included in the pattern. Seam allowances that are not specially marked are 1 cm wide!
Happy sewing!

First sew the front side pieces to the front piece, right sides together, and neaten the seam allowances together. Then iron them to the side seam.

Also neaten the shoulders of the front piece individually.

Now close the center back of the back pieces right sides together, neaten the seam allowances and iron them to the side.

Sew the back side pieces to the back piece, right sides together, neaten the seam allowances and iron them to the side seam.

Overcast all side seams of the front and back pieces and the shoulder seams of the back piece individually.

Sew the seam of the right shoulder right sides together and press open the seam allowances.

Iron the neck band left sides together in the fold and place it right sides together in the neck hole. Stitch it firmly and then clip the seam allowances in the curves.


Now also close the left shoulder right sides together and press open the seam allowances.

Fold the band inwards and stitch it tight at the edge. Your processed neckline is finished.

The procedure for the armholes is similar. Stitch the armhole band, ironed in the fold, right sides together and clip the seam allowances in the curves.


Now close the left side seam right sides together up to the zipper snap and iron the seam allowances apart.

Sew in the hidden zipper with the matching foot.

Now fold the left armhole band inwards and stitch it almost through the edge.

Sew the right side seam together, right sides facing, and iron the seam allowances apart.

Now fold the right armhole band inwards and stitch it almost through the edge.

Iron the hem according to the pattern and stitch it through the edge.
Your KONSTANZE is ready!
If you don't know what to do, or if you have any questions, please send us an email to info@schnittmuster-berlin.de. We will answer you as soon as possible.
Have a lot of fun with your new designer piece!
Sincerely, your Sewing Pattern Berlin team.
