
Sewing instructions shirt Kristin
The Kristin women's shirt, with its lovely wrap-style front, is reminiscent of the Eileen dress. The gathering on the left side of the body provides some coverage and ensures a flattering fit. It's the perfect summer shirt to wear with skirts and trousers.
Length at back center = 51 - 58 cm
Kristin was sewn from jersey fabric in this tutorial.
Materials needed:
We recommend a jersey with elastane .
Sizes 34-42
- Outer fabric 0.90 m (140 cm wide)
Size 44-50
- Outer fabric 1.30 m (140 cm wide)
Cut:
Seam allowances are included - 1cm wide or as indicated by the marking notches!
Cut out the pattern pieces from your fabric. Place the fabric right side up. Align the selvedges parallel to the center so you can lay the front and back pieces on the fold. Always align the thread arrow in the same direction on all pieces and parallel to the selvedge of the fabric. Transfer all notches from the pattern by making a 3mm snip with scissors or using chalk . Snip the seam allowance on the fold, as this is always the center point. Markings define the positions of dart ends , pocket positions, etc. Transfer these either with chalk or pins .

You will need the following fabric:
- 1x left front part
- 1x right front part
- 1x back piece in half
- 2x sleeves, mirrored
Sewing instructions:
Seam allowances are included - 1cm wide or as indicated by the marking notches!
To sew this shirt you will need a sewing machine and an overlock sewing machine, or alternatively the zigzag stitch of your sewing machine to finish the cut edges.
Be sure to use a jersey needle and a stretch stitch. If you're using a domestic sewing machine, you should use either a zigzag stitch or a three-step elastic stitch. Afterwards, finish all seam allowances with a zigzag stitch or another suitable stitch to prevent fraying. The colored lines in the pictures, in addition to the written description, show you where to sew a seam or glue something.
When sewing, pay attention to the seam allowance included in the pattern. Seam allowances not specifically marked are 1 cm wide!
Have fun sewing!
Sizes 46-50 have a bust dart; please sew it according to the pattern. A simple, straight dart is sewn as follows after accurately transferring the markings: Align notches with notches, draw a line with tailor's chalk to ensure you sew correctly and that the side seam finishes straight. Sew from the widest point to the point, tapering the seam nicely (to prevent the dart from bunching). To avoid having to backstitch at the point, you can sew the last centimeter with a very small stitch. Press the dart's contents upwards.

First, finish the seam allowances of both necklines on both front pieces and the back neckline. Then press them 1 cm to the inside (to the wrong side). Next, place the front pieces right sides together at the shoulder on the back piece and sew these seams. Finish the seam allowance and press it towards the back piece.

Next, stitch the seam allowance of the neckline 0.7cm from the right.

Finish the raw edge of the right front piece (the one on top) and press it 1 cm to the inside. Then topstitch the hem allowance at 0.7 cm. To make the edges look neat, press the neckline and hem edges flat.
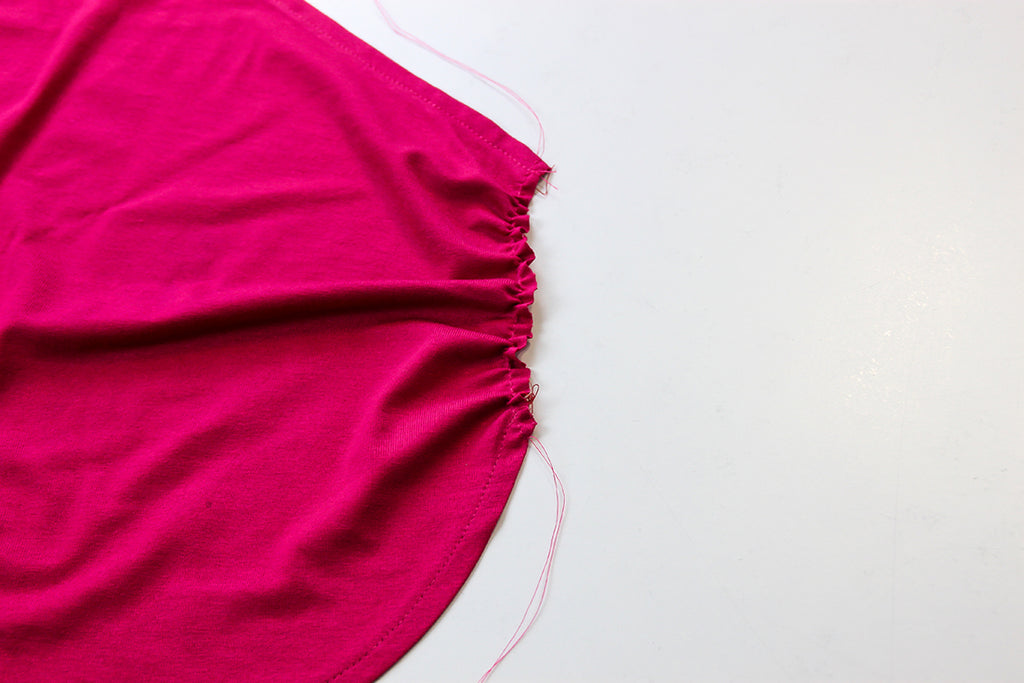
Next, we'll work on the front overlap (right front). Here you need to gather the side edge. We have a video here where Dagmar shows you the best way to gather it.
You do this by first sewing along the side with the longest stitch (0.7 cm apart). Leave the thread longer at both ends. Knot one end, and on the other end, pull and gather the fabric so that it fits between the two notches of the left (underlap) front piece (distribute the gathers evenly).

Place the gathered front piece on top of the lower front piece according to the markings and pin it in place at the side seams. Then sew the side seams together with a 0.7cm seam allowance (making sure that the right front piece ends 1cm above the hem of the left front piece).
Now sew the entire front piece to the back piece along the side seams (1.5 cm), right sides together. Finish the seam allowances together and press towards the back.

Next, finish the raw edges of the lower front and back pieces and press them under by 1 cm. Then, topstitch the hem 0.7 cm from the edge. For easier handling, fold the upper front piece away to prevent it from being accidentally stitched in. Finally, press the hem flat.

Sew the sleeves together right sides facing and finish the seam allowances and hem.

Iron the hem edges inwards at 1cm and sew the sleeve hems at 0.7cm.

Finally, simply sew the sleeves into the corresponding armholes and neaten the seam allowance together.

Your KRISTIN is finished!
If you get stuck or have any questions, please feel free to contact us by email at info@schnittmuster-berlin.de. We will reply as soon as possible.
Have lots of fun with your new designer piece!
Sincerely, your Schnittmuster-Berlin team.