Sewing instructions summer shirt Olga
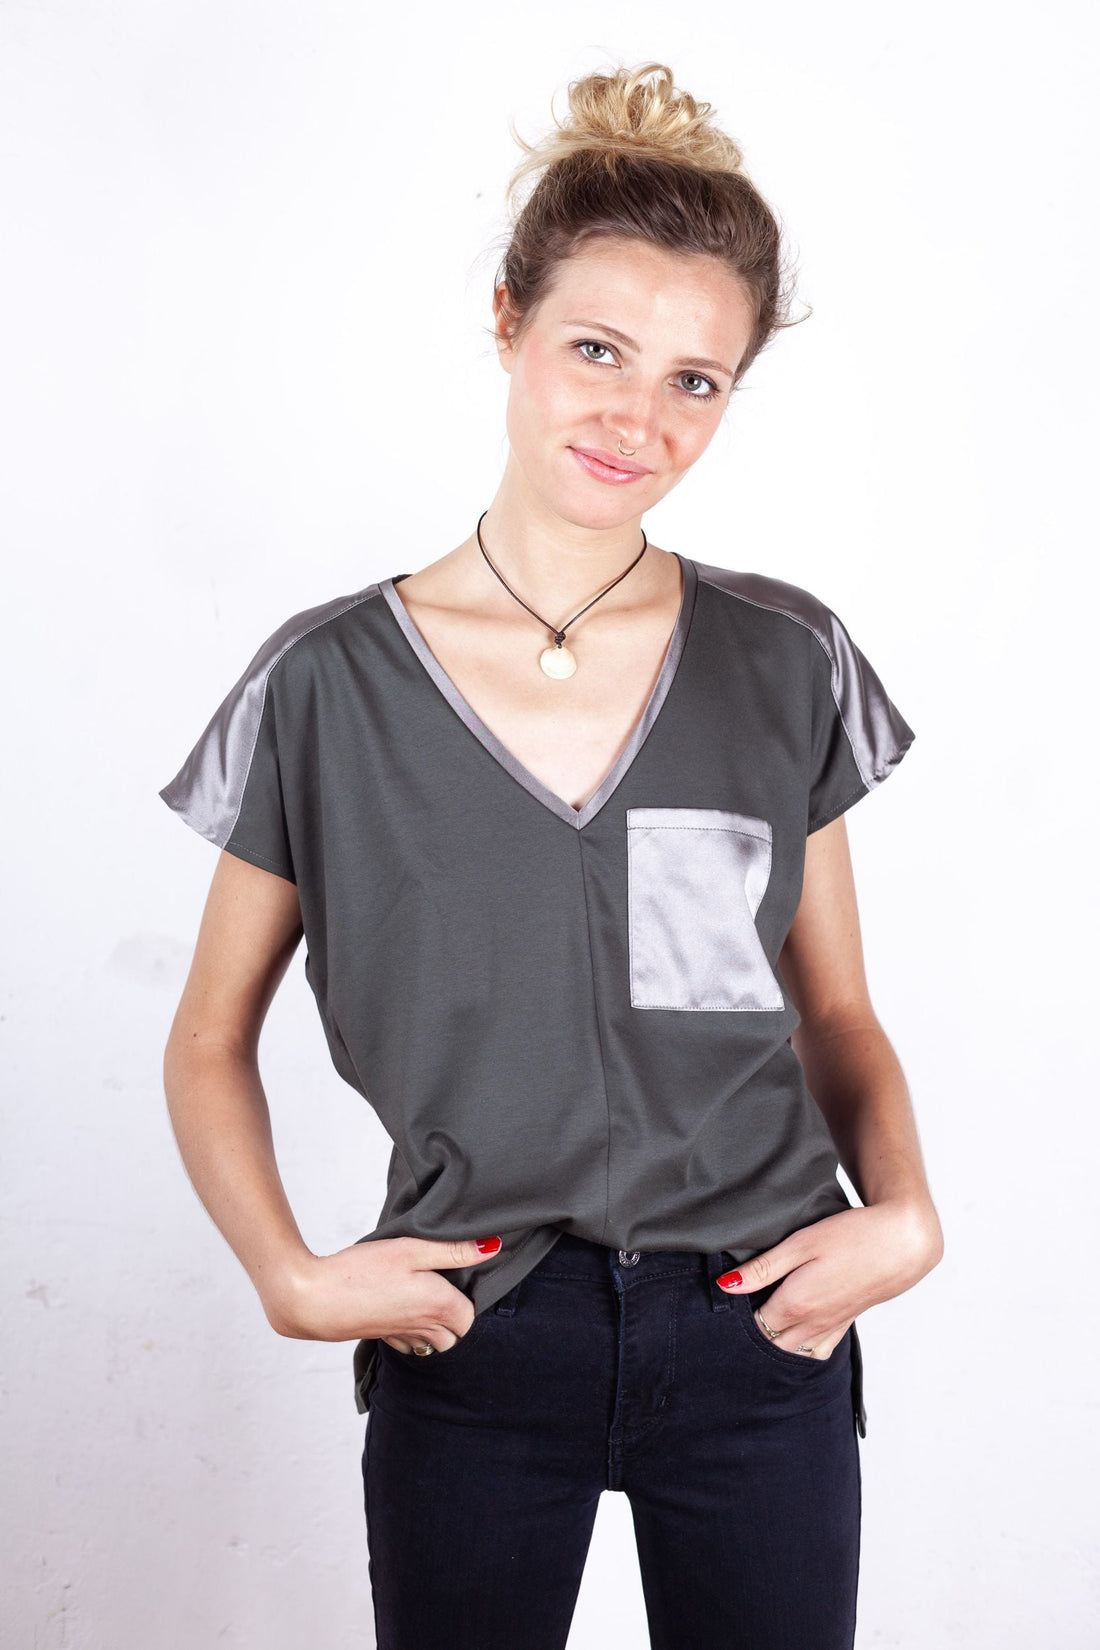
If you think all shirts are just the same, our Olga pattern will show you just how incredibly versatile this style is. We've stayed true to our love of patching different fabrics and have created a great, casual shirt with dropped shoulders for you. As always, the special feature lies in the details: the one-piece shoulder yoke, the patch pocket, and the narrow stripe in the V-neck are made of contrasting fabric. The center back length is 72-76 cm.
The casual yet chic Olga blouse with breast pocket was sewn in this example from a viscose jersey combined with a cotton fabric.
→ To the pattern “Blouse Olga”
Required materials:
We recommend jersey, or polyester satin, silk or viscose as a contrast fabric.
- Sizes 34-40: Outer fabric 0.85m (140cm wide)
- Sizes 42-50: Outer fabric 1.5m (140cm wide)
- Sizes 34-50: Contrast fabric 0.40m (140cm wide)
Cutting:
Seam allowances are included - 1cm wide or as marked!

Cut the pattern pieces out of fabric and transfer the notches from the pattern. The colored clips in the pictures, in addition to the description, show you where to sew a seam.
- 1x front part opposite
- 1x back part in the fracture
- 2x yoke opposite
- 1x strip for the neck hole
- 1x bag
Sewing instructions:
Seam allowances are included - 1cm wide or as marked!
Iron your bag according to the pattern piece. Fold the top edge inward twice, following the markings. To prevent any exposed edges from being visible from above, fold the top corners inward like a small triangle. Stitch the top edge in place, keeping it close to the edge.

Pin the pocket, wrong sides together, to the left front piece of the blouse along the markings on the pattern, and stitch it in place along both sides and the bottom edge, close to the edge. This way, the small triangles ensure a neat finish from the top as well.

Now iron the edges of the armholes on both front pieces and on both sides of the back piece inward along the seam allowance. Do the same with the armholes of the four yoke pieces.
Place two matching yoke pieces, right sides together, on the top edge of the back piece and sew them together. Start on the inside, bartack the seam, and finish on the outside, right at the ironed edge. You'll see this in more detail in later steps. Press the seam allowance toward the yoke and stitch it in place, close to the edge.

Place the matching front piece with its right side facing the top yoke edge. Now the other yoke piece should also be placed with its right, open top edge facing up. This is easiest if you either fold the remaining fabric together or roll it up and reach under the layers from behind, pulling them upwards from the back, over the bottom.
This sounds a bit complicated, but it's quite easy once you do it the first time. I let the many layers of fabric peek out of the side opening on the left (part of the neckline), which allows me to easily close this seam (blue clips).

Here, too, you start from the neckline and sew to the ironed edge. This is how it looks. Then topstitch from the right side, close to the edge.

The clips indicate that the two yoke pieces now need to be sewn together, right sides together, along the ironed edge to ensure the armhole is neatly closed. Turn the yoke inside out again through the neckline opening and close the side seam by sewing directly along the ironed edge.

Turn it right side out again, iron the edge flat, and you've got a neatly sewn armhole. Since the lower parts of the armhole (the petrol-colored fabric) have been ironed inward, you don't need to stitch them yourself.
Close the center front of your blouse, right sides together.
Then, with right sides together, sew the side seams of your blouse up to the slit marking on the pattern. It's best to sew these seams with a regular sewing machine so you can press the seam allowances open later, making it easier to sew the slit.

First, fold the hem inward twice, following the markings on the pattern, and iron it in place. Then, fold the vent pieces inward twice, also following the markings. Ironing will make sewing much easier later.
Stitch the folded edges in place close to the edge. For the slits, sew horizontally across the side seam at the top and then continue as usual on the other side.

Now your slit is neatly finished. Iron the neckline strip in half lengthwise, wrong sides together.

Place the two open side edges right sides together and sew them together along the notch. Then trim the seam allowances. It's recommended to notch the center seam just before the seam to create a neat V-neck. Right image: This is your neckline strip.

Pin it around the neckline, right sides together, making sure the V-neck is aligned with the center front, and stitch it all the way around. Topstitch the neckline from the right side, close to the edge.

Congratulations, your blouse OLGA is finished!
If you're stuck or have any questions, please email us at info@schnittmuster-berlin.de. We'll respond as soon as possible.
Have lots of fun with your new designer piece!
Sincerely, your Schnittmuster-Berlin team.