Sewing instructions for the Atlanta jacket
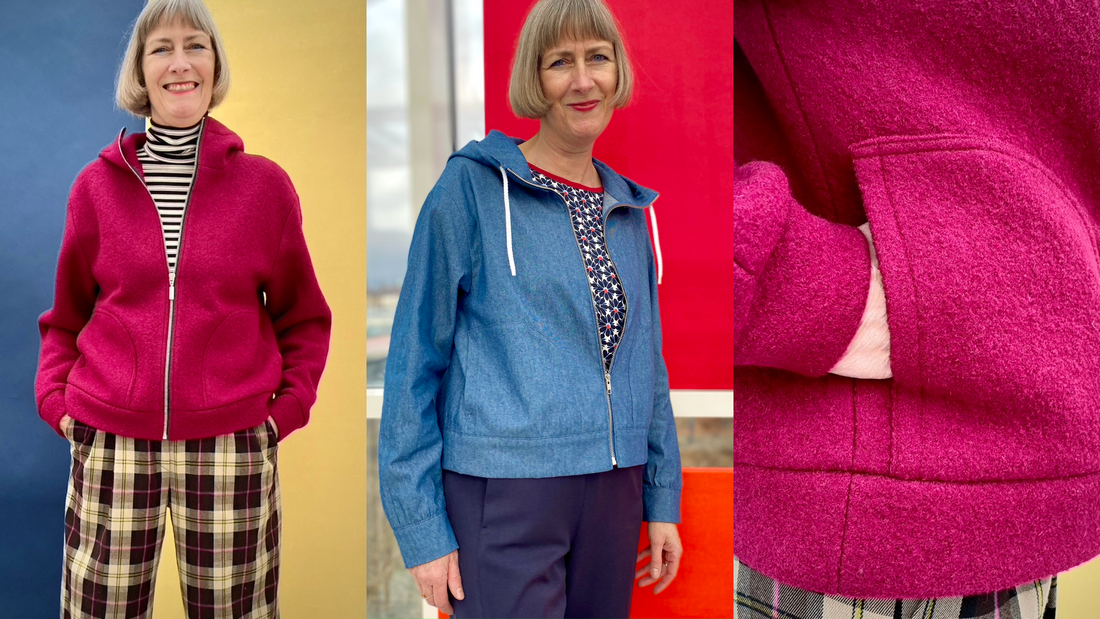
If a jacket can do everything, then this one... Atlanta hooded jacket. By sporty to casual to chic Does this jacket have fashionable short style Depending on the material, they have their own character and are incorporated into large patch pockets A lot of things fit. hood It's not only casual, but also provides protection when the weather changes. The tear in the front center It's perfect for adding a splash of color, and the Hood drawstring It offers scope for loving details. Two-seam sleeves ensures a perfect fit.
On average, two processing options are given for the hood.
Length at the back center = 55-67 cm.
Atlanta was sewn from a thin denim fabric in this tutorial.
Materials needed:
We recommend boiled wool, quilted fabric, denim, sweatshirt fabric, scuba fabric, performance fabric
| Sizes 34-42 | Outer fabric | 1.80 m | 140 cm wide |
| Sizes 44-50 | Outer fabric | 2.10 m | 140 cm wide |
| Sizes 34-50 | insert | 0.05 m | 90 cm wide |
| Sizes 34-50 | Zipper tlb. | 1 piece | 57-65 cm long |
| Sizes 34-50 | cord | 1 piece | 100 cm long |
Cut:
Seam allowances are included - 1cm wide or as indicated by the marking notches!
Cut out the pattern pieces from your main fabric. Place the fabric right side up. Align the selvedges parallel to the center so you can lay the back piece, facing, and waistband on the fold. All pattern pieces should be laid with the printed side facing up. Always align the grainline arrow in the same direction on all pieces, parallel to the selvedge of the fabric. Transfer all notches from the pattern by making a 3mm snip with scissors or using chalk. Snip the seam allowance on the fold, as this is always the center point. Markings define the positions of dart ends, pocket positions, etc. Transfer these either with chalk or pins.


You will need the following fabric:
- 1x back piece in half
- 2x front part, mirror image
- 2x bag, opposite each other
- 2x front waistband, mirrored
- 1x back of the fold
- 2x front sleeve, mirrored
- 2x back sleeve, mirror image
- 2x sleeve cuffs, mirrored
- 4x hood opposite
- 2x hood center opposite
- 1x chin guard (you can also leave it out)

The last two positions are optional:
- 2x hood (opposite)
- 1x Hood center
- 2x hood facings, opposite each other
Sewing instructions:
To sew this hoodie you will need a sewing machine and an overlock sewing machine, or alternatively the zigzag stitch of your sewing machine to finish the cut edges.
The colored lines in the pictures show you, in addition to the description, where to sew a seam or glue something.
When sewing, pay attention to the seam allowance included in the pattern. Seam allowances not specifically marked are 1 cm wide!
Have fun sewing!

You start with the patch pockets on the front.
Neaten up the curve and the short edge.

You iron the serged edges according to the seam allowance width, and you can stitch the straight edge down immediately.

Now pin the pocket to the front piece, paying attention to the cutting mark, and topstitch it close to the edge along the curve. At the pocket opening, make small bar tacks with a narrow zigzag stitch to secure it well. Attach the pocket to the hem with a basting stitch.


The hem cuffs of the front and back pieces can be folded in half at the hem fold and then sewn to the front and back pieces right sides together. Press the seam allowance into the cuff. You'll notice that the cuff is slightly shorter than its counterpart. Therefore, hold the front and back pieces in slightly; this will give your hoodie a subtle blouson effect.

Next, you finish the armholes and the tassel on the front and back of the sleeve.

The individual sleeve pieces are sewn right sides together into the corresponding armholes, and the seam allowance is pressed open from the shoulder to the armhole curve.

Now you can finish the raw edges of your front and back pieces from the shoulder to the sleeve hem. Do the same on the side seam.

Now place the front pieces right sides together on the back piece and sew the shoulder and upper arm seams. Then press the seam allowances open.

Next, we'll work on the sleeve cuffs. Iron them in half at the hem fold.
The sleeve hem is significantly wider than the cuff, so you should first sew a gathering stitch. This helps to achieve even gathering. To do this, select the longest stitch setting on your sewing machine. Do not backstitch at the beginning and end of the gathering stitches; instead, leave approximately 10 cm of thread. Sew two gathering stitches approximately 1 cm apart, one 0.5 cm and the other 1.5 cm from the cut edge, so that the final seam will run precisely between these two stitches. Now you can distribute the extra fabric evenly.

The sleeve cuff is sewn to the lower sleeve edge, right sides together, and the gathering threads can be removed. Press the seam allowance towards the cuff.

Now you can close the side seam in one step and press the seam allowance open. Be sure to unfold the cuffs first.

The front edge of the front pieces and all waistband edges can be finished.

Fold the sleeve cuffs inwards at the fold line and stitch the inner cuff close to the edge from the right side.

At the front center, you fold the corner.

Now you do the same as with the sleeve cuffs: you stitch the inner band close to the edge from the right side.

Now we'll work on the hood.
You start with the eyelets or buttonholes for the drawstring. You've glued a small piece of interfacing to the outside of the hood to prevent the eyelet or buttonhole from tearing out.

Now you sew the outer and inner hood. The center piece is sewn between the two side pieces, the seam allowance is pressed towards the center piece and topstitched close to the edge.

The two hood pieces are joined together at the center front and the edge. Trim the seam allowance at the corner and clip the seam allowance at the curve so that the edge lies flat when you press it.

Next, you do the quilting for the tunnel into which you thread the cord.

The hood can now be attached to the torso. First, iron the front edge, then insert the outer hood into the neckline, right sides together. Make sure you have a straight line along the front edge.

After you have sewn in the hood, iron the seam allowance into the hood. The neckline edge of the inner hood is folded over by 1 cm and topstitched close to the edge.

Now prepare the chin guard: Fold the pattern piece in half lengthwise, right sides together, and sew the two ends together with a 1cm seam allowance. Then turn it right side out, shape the corner and curve, and finish the raw edge.

Then, according to Knips, fold the protector and place it over the end of the left zipper. The rounded side should be on top.

Final spurt!
Now you can pin the zipper to the front edge and stitch close to the teeth of the outer fabric.
Your Atlanta is finished !
If you get stuck or have any questions, please feel free to contact us by email at info@schnittmuster-berlin.de. We will reply as soon as possible.
Have lots of fun with your new designer piece!
Sincerely, your Schnittmuster-Berlin team.