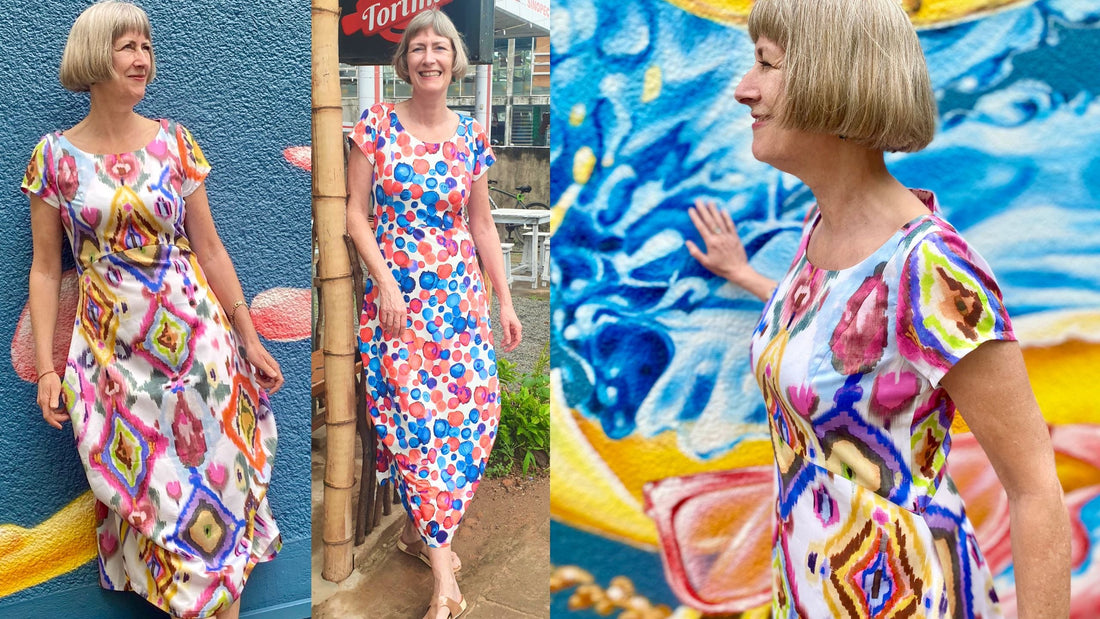
Sewing instructions dress Fleur
shares
Level : demanding - for professionals
Length back center 115cm- 118cm
Required material:
We recommend flowing fabrics such as viscose with elastane
Or light jersey fabrics, a jersey fabric with elastane.
|
Sizes 34-42 Sizes 44-50 |
Outer fabric Outer fabric |
2.10m 2.60m |
140cm wide |
|
Sizes 34-50 |
inlay Formband |
0.40m 0.80m |
90cm wide
|
| Sizes 34-50 | Seam ripper | 1 piece | 30 cm long |
Fleur was created in this tutorial from a thin cotton satin sewn.
Cutting:
Seam allowances are included - 1cm wide or as per marking clips!
Cut the pattern pieces out of your outer fabric and interlining. Lay the fabric with the right side facing up. Lay the selvedges parallel to the middle so that you can lay the back piece, collar stand, under and upper collar on the fold. The pattern pieces should all be laid with the writing facing up. Always align the grain arrow on all pieces in the same direction and parallel to the selvedge of the fabric. Transfer all notches from the pattern by making a 3mm long cut with scissors or chalk and mark the ends of the darts. Notch the seam allowance on the fold of the fabric because this is always a middle. Markings define the positions of dart ends, pocket positions, and much more. Transfer these either with chalk or pins. It is best to cut all outer fabric pieces that are to be completely covered with interlining roughly first. After you have secured the interlining, cut it out precisely. There is also a video here about gluing and securing pattern pieces.


You will need fabric:
- 1x front part in the fracture
- 2x front side panel opposite
- 2x rear side panel opposite
- 2x back part opposite
- 2x sleeves opposite
- 1x skirt front in fold
- 1x skirt back part in fold

also with insert:
- 1x front neck hole facing in the break
- 1x rear neck hole cover in the break
Sewing instructions:
Seam allowances are included - 1cm wide or as marked!
To sew this dress you will need a sewing machine and an overlock sewing machine, or alternatively the zigzag stitch on your sewing machine to neaten the cut edges.
In addition to the description, the colored lines on the pictures show you where a seam needs to be sewn or something needs to be glued.
When sewing, pay attention to the seam allowance included in the pattern. Seam allowances that are not specifically marked are 1cm wide!
Have fun sewing!

You start with the front part.
Sew the front side piece right sides together to the front piece, neaten the seam allowances together and iron them towards the centre front.

Now neaten the bottom edge of the front neckline facing and sew it right sides together to the front neckline. Cut the seam allowance in the curved area so that the curve lies well.

Then stitch the seam allowance down onto the facing.


Now you can sew the front part of the skirt to the front part and the back part of the skirt to the back part. The seam allowance is neatened together and ironed upwards

Before you close the side seam, prepare the hems. On the back part of the skirt, fold over 2x 1 cm and stitch it down, on the front part of the skirt, just iron over 2x 1 cm , do not stitch yet!

In the left side seam, the seam allowance on the front and back parts is individually neatened in the area of the zipper.


Now the side seam is closed. You place the back piece right sides together on the front piece, pin them together and cut the "corners" (3 pieces per side) into the side seam a little (just the seam allowance).

Make sure that you leave an opening for the zipper in the left side seam. Then neaten the seam allowance and iron it to the front.

The hem is now finished. To make it neat, fold the seam allowance of the back hem diagonally, then topstitch the front hem.

Now you need to attach the appropriate seam ripper foot to your machine. There are several different types of zipper foot. This is one of them. You can find more information about seam rippers here.

The seam ripper is then inserted into the side seam on the front and back pieces up to the mark.
Secure the seam ends with a few stitches on the seam allowance.

Next, close the shoulder seam right sides together including the facing, neaten the seam allowance together and iron it forward

Fix the neckline facing in the shoulder seam by stitching in the shadow of the shoulder seam. Do the same at the center back.

Finally, you finish the sleeve. Close the sleeve seam right sides together and neaten the seam allowances. These are then ironed to the front.

The sleeve hem is folded over 2x 1cm and stitched.

Final spurt!
The sleeves can be sewn into the respective armholes right sides together. Pay attention to the notches.
The seam allowance is neatened together and ironed into the sleeve

Your FLEUR is ready
If you don't know what to do or if you have any questions, please send us an email at info@schnittmuster-berlin.de. We will answer you as quickly as possible.
Have lots of fun with your new designer piece!
Best regards, your Schnittmuster-Berlin team.
