Sewing instructions for Hermine leggings
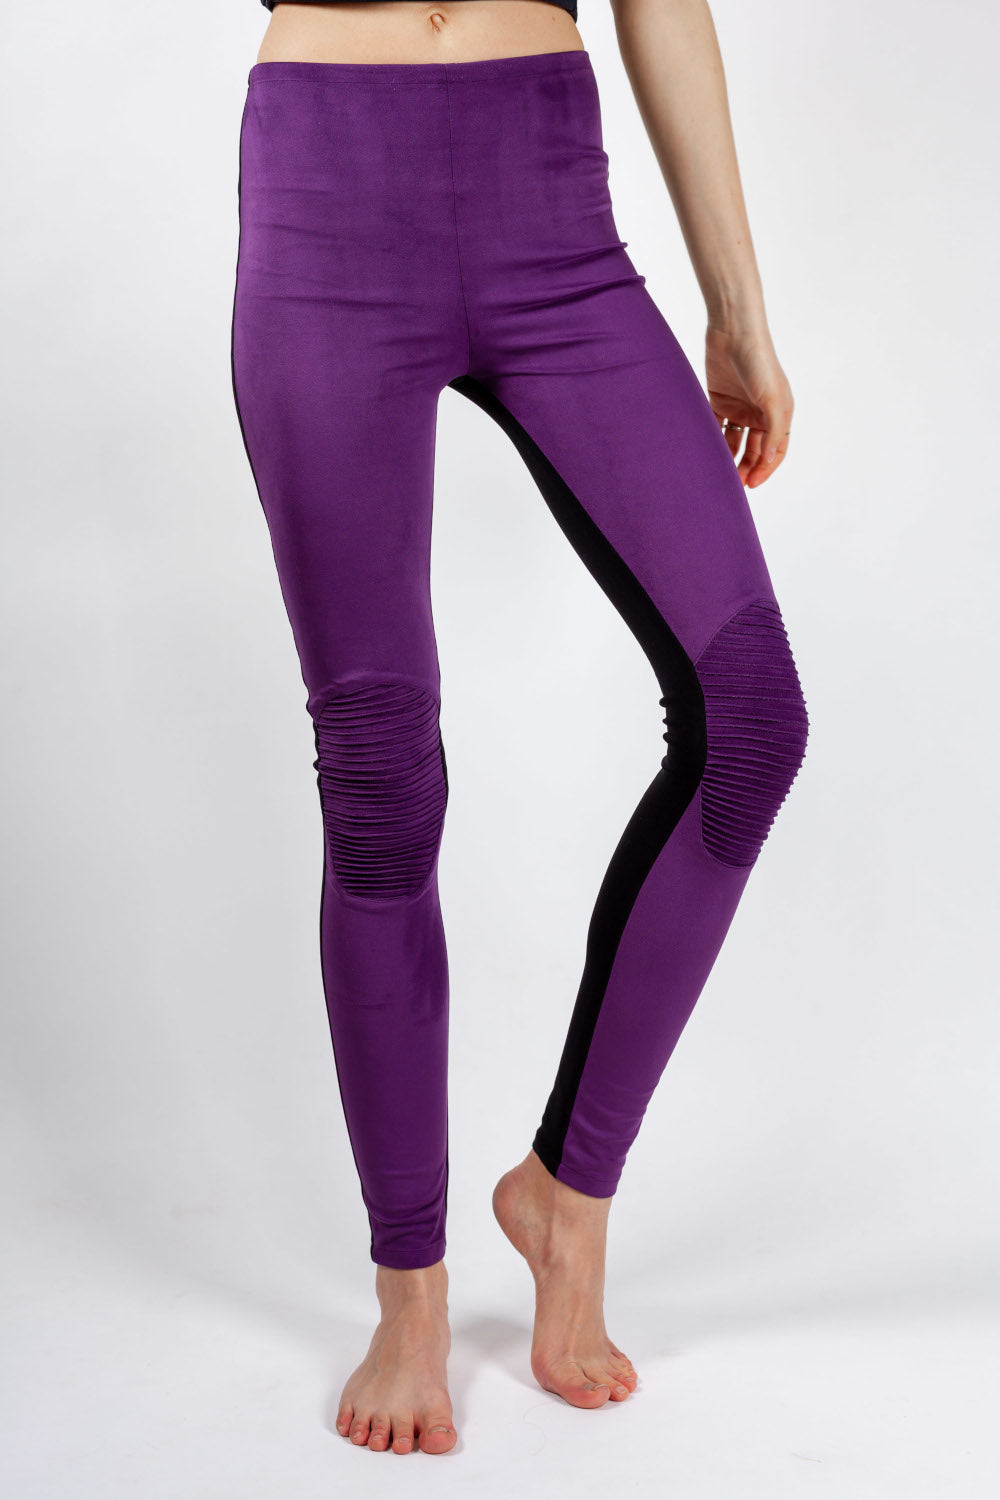
The Hermine leggings, with piping at the knee, fit closely and are super comfortable thanks to their stretchy fabric. Faux leather on the front, stretch jersey on the back, and a narrow elastic waistband ensure the right support and comfort. Long tops like the Judita blouse or the Cemre sweater pair beautifully with Hermine .
Side length = 108 cm
In this tutorial, Hermine was sewn from faux leather and sturdy jersey, both of which are stretchy.
Required materials:
We recommend a very stretchy faux leather and a jersey that is also stretchy and opaque.
| Sizes 34-38 | artificial leather | 0.65 m | 140 cm wide |
| jersey | 1.20 m | 140 cm wide | |
| rubber band | 0.70 m | 1.5 cm wide | |
| Sizes 40-50 | artificial leather | 1.00 m | 140 cm wide |
| jersey | 1.20 m | 140 cm wide | |
| rubber band | 1.05 m | 1.5 cm wide |
Cutting:
Seam allowances are included - 1cm wide or as marked!
The front of the pants is made of faux leather, and the back is made of jersey. Cut the pattern pieces from your outer fabric. Lay the fabric right side up. The pattern pieces should all be placed with the lettering facing up. Always align the grain arrow on all pieces in the same direction and parallel to the selvedge of the fabric. Transfer all notches from the pattern by making a 3mm snip with scissors or chalk. Marks define the positions of darts, pockets, and much more. Transfer these with chalk or pins. 
You will need fabric:
- 2x rear trousers opposite
- 2x front trousers top opposite
- 2x front trousers bottom opposite
- 2x knee rough cut
Sewing instructions:
Seam allowances are included - 1cm wide or as marked!
To sew these pants you will need a sewing machine and an overlock sewing machine, or alternatively you can use your sewing machine's zigzag stitch to neaten the cut edges.
Be sure to use a jersey needle and a stretchy stitch. This means that if you're using a home sewing machine, you should use either a zigzag stitch or the three-part stretch stitch. Then, finish all seam allowances with a zigzag stitch or another similar stitch to prevent fraying. The colored lines in the images, in addition to the description, show you where to sew or glue a seam.
When sewing, pay attention to the seam allowance included in the pattern. Seam allowances not specifically marked are 1 cm wide!
Have fun sewing! 

From the cut-out rough cut of the knee insert, narrow piping is sewn at regular intervals according to the notches. 
Then place the “fine cut” pattern piece on the prepared piping and cut it. 
This is what the finished cut of the knee insert looks like. 

Sew the knee inserts onto the upper and lower front trouser pieces… 
...and clip all around so that the seam allowances can be laid flat later.
Neaten the seam allowances of the knee inserts together. 
Finally, you need to stitch the knee insert all the way around the leg piece, close to the edge. 

The finished seam allowance is then flat-stitched onto the back of the trousers, close to the edge. 

The crotch seams of the front and back trousers are first finished individually… 

The upper cut edge of the trousers is finished all around… 
... ironed and stitched at 1.5cm. Pay attention to the notches in the pattern and make sure you leave a small opening at the center back for the elastic to pass through. 
 Cut the elastic according to the pattern and then thread it through the opening in the tunnel with a pin. Sew the elastic together at the correct width and then close the opening in the waistband.
Neaten the trouser hem all the way around. 
Iron the trouser hem according to the clippings in the pattern and stitch it at 1.5 cm.
Your HERMIONE is ready !
If you're stuck or have any questions, please email us at info@schnittmuster-berlin.de. We'll respond as soon as possible.
Have lots of fun with your new designer piece!
Sincerely, your Schnittmuster-Berlin team.