In this tutorial, Roberta was sewn from a thick wool fabric and a lining fabric.
Sewing instructions for Roberta coat
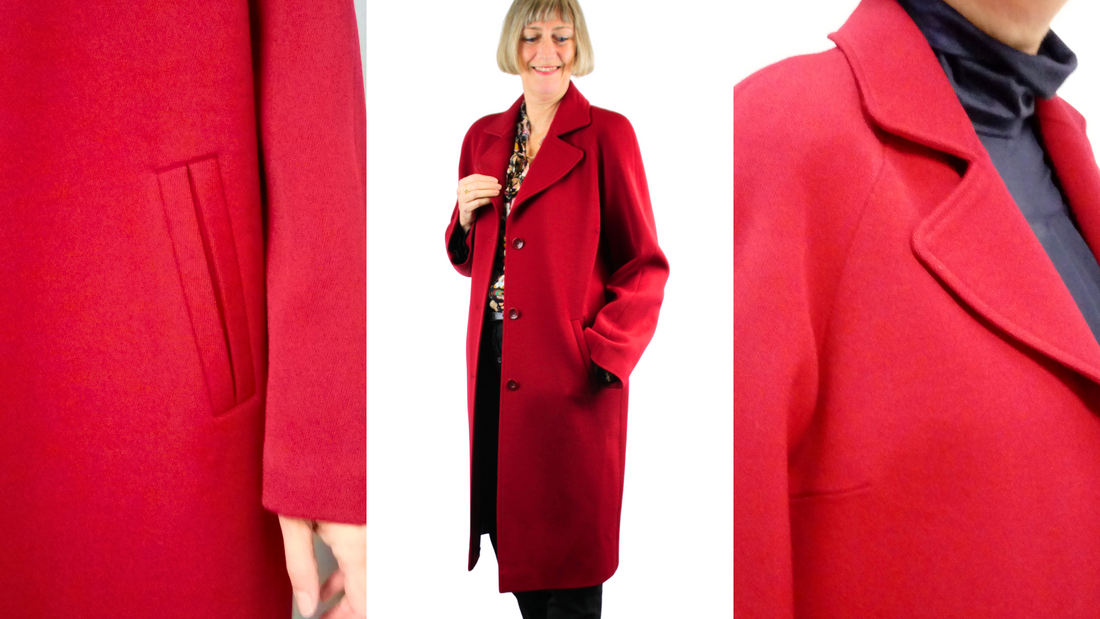
We love the beautiful Indian summer, but we're also already looking forward to cooler temperatures, clear winter nights, and maybe even snow and ice. Until then, you still have plenty of time to sew the Roberta raglan coat. Admittedly, it's not a quick or easy project, but the effort is definitely worth it. The casual and cool shape pairs perfectly with a thick sweater and a fluffy scarf; then, despite the lapel collar, you'll be safe from any cold draft. Other details include the wide welt pockets and the eye-catching tab at the back.
Length in the center back = 104 - 108 cm
Cutting:
Seam allowances are included - 1cm wide or as per marking clips!
Cut out the pattern pieces from your outer fabric, lining fabric, and interfacing . Lay the selvedges parallel to the center. The pattern pieces should all lie with the lettering facing up. Always align the grain arrow on all pieces in the same direction and parallel to the selvedge of the fabric. Transfer all notches from the pattern by making a 3mm cut with scissors or chalk and mark the ends of the darts. Notch the seam allowance along the fold, as this is always the center. It's best to roughly cut all outer fabric pieces that will be completely covered with interfacing first. After you've secured the interfacing, cut it out precisely.
Also check out our video on feeding.

You will need the following outer fabric:
- 2x front part opposite
- 2x back part opposite
- 2x front sleeve opposite
- 2x back sleeve opposite
- 1x upper collar
- 1x undercollar
- 2x collar stand
- 2x front part facing opposite
- 1x back cover
- 4x pocket piping
- 2x bar back part
- 2x rear pocket bags opposite

You will need lining material:
- 2x front part opposite
- 1x back part in the break
- 2x front sleeves opposite
- 2x back sleeve opposite
- 2x pocket bags


You will need from insert:
- 2x front part opposite
- 2x front part facing opposite
- 1x back cover
- 1x upper collar
- 1x undercollar
- 2x collar stand
- 4x pocket piping
- 2x fixation of front sleeves opposite
- 2x fixation of the back sleeves opposite
- 2x fixation back part opposite
- 2x hem insert back part opposite
- 2x hem inserts for front sleeves opposite
- 2x hem inserts for the back sleeves
- 2x rear latch
Sewing instructions:
Seam allowances are included - 1cm wide or as per marking clips!
To sew this coat you will need a sewing machine.
In addition to the description, the colored lines in the pictures show you where a seam needs to be sewn or something needs to be glued.
When sewing, pay attention to the seam allowance included in the pattern. Seam allowances not specifically marked are 1cm wide!
Have fun sewing!

After you've cut and glued everything, the first thing to do is sew the piping pockets: Transfer the pocket opening to the front pieces. Also draw the sewing line on the piping. Iron the piping strips in half.

Now pin the piping (right sides together) onto the markings so that the seam allowances are facing each other. There should be exactly 4cm between the sewing lines, and 2cm from the break in the piping to the sewing line. Now sew these lines. Make sure they are at right angles and the same length. Check the spacing again afterward to ensure the piping pocket is straight and the same width.


Now cut the pocket open (dotted line): in the middle between the two pipings, up to about 1.5 cm from the end. Cut a triangle here, up to the last stitch.

Now turn the piping inside out and iron the seams flat.

Now sew the small triangles onto the piping. Check on the front that the short side of the piping is square and that the piping meets exactly in the middle. Hold everything firmly and fold the front piece over so you can see the fabric triangle and the piping. Sew over the triangle several times (from notch to notch). The short sides of the pocket opening are now also secured.

Now sew the back pocket bag (fabric) from the inside to the top piping seam allowance, just next to the first seam.

Sew the front pocket lining to the bottom piping seam. Iron the seams flat.

Put the two pocket bags together and sew them together.

Sew the bust darts and iron them upwards.

Then sew the upper darts and iron them apart.

Sew the center back together, right sides together. Now iron the seam allowances open and the hem facing inward.

Sew the back bartack right sides together, leaving a hole for turning. Before turning, cut small triangles out of the seam allowance at the curves to create a nice curve. Handstitch the hole closed and topstitch the bartack 0.7 cm from the edge.

Sew the back facing right sides together to the two front facings and iron the seam allowances apart.

Sew one front and one back sleeve together along the top sleeve seam, right sides together. Press the seam allowances open and the hem facing inward.

Now sew the front sleeves, right sides together, to the front pieces and the back sleeves to the back piece, making sure to notch. Then you can press the seam allowances open.

Place the front and back pieces right sides together and sew the side seam, including the bottom sleeve seam. Press these seam allowances open as well.

Now sew the collar stands (top curve) right sides together to the collars (bottom curve). Press the seam allowances open and snip the collar slightly to make it lie flatter.


Pin the undercollar to the upper collar, right sides together, and sew them together on three sides, as shown. Cut triangles from the seam allowance here again, turn the collar inside out, and iron it flat.

Sew a narrow ribbon for hanging from the lining fabric. Turn it inside out and press it. Sew it to the back facing, the same distance from the center back. You can also make it from the outer fabric or use a ready-made ribbon.


Pin the front facing to the front piece, right sides together, and sew up to the collar insert notch. Cut triangles from the seam allowance at the curves and press them open.

Sew the undercollar with stand to the front and back pieces and the upper collar to the front and back facing: Start with the upper collar and sew it to the curve of the back facing.


Do the same with the undercollar, which you sew onto the outer coat.


The collar has two corners, and so do the front facings (see also the pattern). Sew between them. On the front facing, clip the seam allowance just before the seam (like set-in corners).

Turn the whole thing under the machine so that the undercollar and the facing are now on top of each other and continue sewing to the center back.


Press the seam allowances apart and sew the two collar seams together at the seam allowances.

Sew the front lining sleeves to the back sleeves, right sides together. Press the seam open.

Sew the darts in the front pieces and iron them upwards.

Place the back piece right sides together (on the fold). Sew the lining pleat parallel to the center back up to the markings at the top and bottom. Press the pleat into the right back piece.

Sew the front lining sleeves to the lining front pieces and the back lining sleeves to the lining back piece. Press the seam allowances open.

Now you can sew the side seams. Leave a hole in the sleeve seam for turning the coat later. Press these seam allowances open, including the open seam.


Now pin the lining to the facings right sides together and sew it from hem to hem.

Before turning the coat inside out, place the lining sleeves on top of the outer fabric sleeves, wrong sides together. Fold them over so you can pin the seam allowances right sides together. Then sew the sleeve hem. Turn the coat inside out through the still open hem. Press the seam allowances on the front and sleeves into the lining from the outside.
Also pull out the sleeve hems and sew the seam allowances together so that the hem cannot slip down.

Pin the lining to the hem, right sides together, and sew it in place. Sew a curve from the front edge to the lining, as shown. Sew the seam allowances together at the dividing seams to prevent the hem facing from slipping down. You can turn the coat inside out and press the hems through the hole in the lining sleeve.

Now sew the hole in the lining close to the edge.

Now topstitch the front edge 0.7cm from the outside, up to the lapel fold. From there, topstitch the lapel and collar on the inside of the coat, again up to the lapel fold, and then again on the outside to the hem.
Close the hole in the sleeve.
Sew buttonholes onto the front and back bar as marked on the pattern. Sew the matching buttons onto the front and back.
Your ROBERTA is ready!
If you're stuck or have any questions, please email us at info@schnittmuster-berlin.de. We'll respond as soon as possible.
Have lots of fun with your new designer piece!
Sincerely, your Schnittmuster-Berlin team.