Sewing instructions for Lera sweater
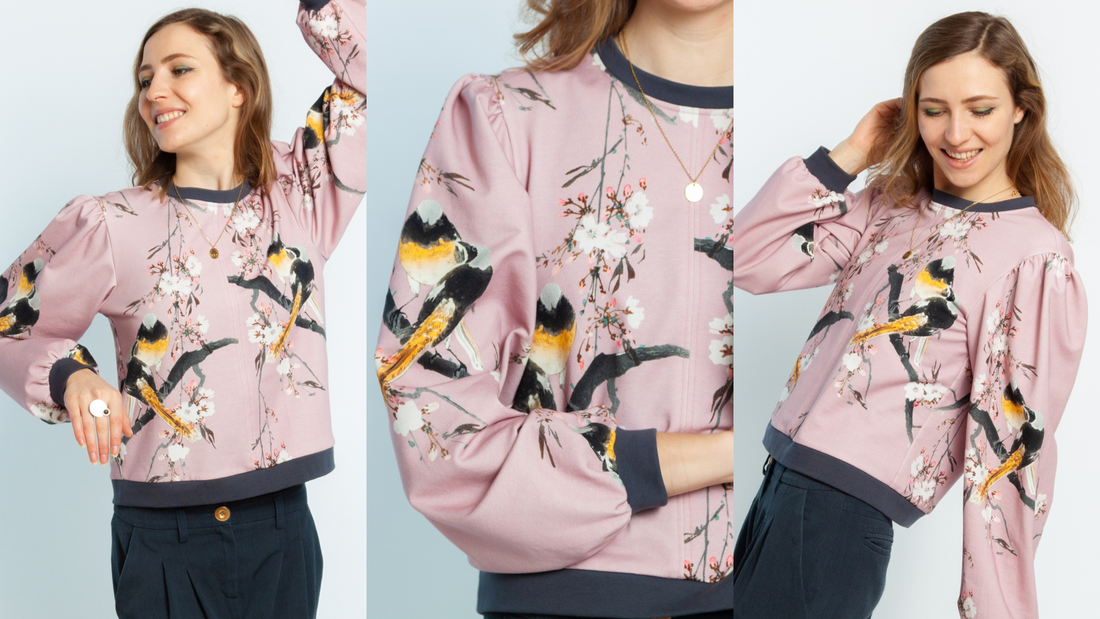
The short, boxy sweater is the ideal complement to high-waisted trousers and skirts , making it an absolute must-have for all fashion enthusiasts. With its front seam and contrasting cuffs, Lera is a real eye-catcher. You can sew the sweater in various designs; we've included an additional sleeve option in the pattern for this. The puff sleeve looks particularly good in a lace fabric with a bit of body, but organza is also a great option.
Length in the center back = 51 -58 cm
Lera was sewn in this tutorial from a soft sweat fabric.
Required materials:
We recommend a jersey, knit, or sweatshirt fabric, and elastic lace or finished cuffs for the cuffs, preferably in a contrasting color. The puff sleeve version looks great in a stiffer lace or organza fabric.
| Sizes 34-42 | Outer fabric, no matter which sleeve | 1.20 m | 140 cm wide |
| Sizes 44-50 | Outer fabric, narrow sleeve | 1.40 m | 140 cm wide |
| Sizes 44-50 | outer fabric, wide sleeves | 1.60 m | 140 cm wide |
| Sizes 34-50 | cuff fabric
cuffs |
0.45 m 0.30 |
72 cm wide
140 cm wide |
Cutting:
Seam allowances are included - 1cm wide or as per marking clips!
Cut out the pattern pieces from your outer fabric. Lay the fabric right side up. The pattern pieces should all be laid out with the writing facing up. Always align the grain arrow on all pieces in the same direction and parallel to the selvedge of the fabric. Transfer all notches from the pattern by making a 3mm snip with scissors or chalk and mark the ends of the darts. Note that bust darts are required from size 40 upwards. Notch the seam allowance along the fold of the fabric, as this is always the center. Markings define the positions of dart ends, pocket positions, and much more. Transfer these either with chalk or pins. 

You will need fabric:
- 2x front part, opposite
- 2x back part, opposite
- 1x neckband
- 1x waistband
- 2x sleeves, opposite
- 2x cuffs
Sewing instructions:
Seam allowances are included - 1cm wide or as per marking clips!
To sew this sweater you will need a sewing machine and an overlock sewing machine, or alternatively the zigzag stitch on your sewing machine to neaten the cut edges.
In addition to the description, the colored lines in the pictures show you where a seam needs to be sewn or something needs to be glued.
When sewing, pay attention to the seam allowance included in the pattern. Seam allowances not specifically marked are 1cm wide!
Have fun sewing! 
Sizes 40-50 have a bust dart; please sew this according to the pattern.

Start your sewing by individually overcasting the front and back centers of the front and back pieces. 
 You can then place the center back and the center front right sides together and sew them together.
 Iron the seam allowances apart and stitch a seam the width of your stitching foot to the right and left of the center back and front.
Now place the front and back pieces right sides together and close the shoulder seam. Neaten everything together and press the seam allowances to the back. 
Sew the neckline band in a circle and neaten the seam allowances together.
Please note: We used ready-made cuffs for the neckline. If you choose to use fabric by the meter, the process is the same as for the hem cuff, described below. The pattern pieces are included in the pattern. 
Then place it right sides together in the neckline and sew it in place. Neaten the seam allowances together and press them down. 
Stitch the ironed seam allowance extra tightly with a stitch the width of your stitching foot. 
Also stitch the shoulder seam allowances extra tightly with a stitch the width of your stitching foot. 
Now sew the side seams together, right sides together, neaten the seam allowances and then iron them to the back. 
Now, turn to the sleeves and sew the inner arm seams right sides together. Neaten the seam allowances together and press them back. 
You also close the sleeve cuffs in a circle and neaten the seam allowances together.
Please note: We used ready-made cuffs for the sleeve ends. If you choose to use fabric by the meter, the process is the same as for the hem cuffs, described below. The pattern pieces are included in the pattern.

Place the cuffs, right sides together, on the sleeve hem, sew them together, neaten the seam allowances, and then iron them upwards. 
You can also secure the seam allowances of the sleeve cuffs with an extra wide stitch. 
The sleeves are prepared and you can stitch them right sides together into the correct armhole and neaten the seam allowances together. 
Iron the cuff for the hem with the wrong sides together. 
Open the fold and sew the cuff together, right sides together. Iron the seam allowances open. 
To prevent the two layers of fabric from slipping, stitch a stitch the width of your quilting foot all around. 
Sew the prepared cuff to the hem of the torso, right sides together. Neaten the seam allowances together and press them upwards. 
You also stitch the seam allowance of the hem with a stitch the width of your stitching foot.
Your LERA is ready!
If you're stuck or have any questions, please email us at info@schnittmuster-berlin.de. We'll respond as quickly as possible.
Have lots of fun with your new designer piece!
Sincerely, your Schnittmuster-Berlin team.