Sewing instructions for the Sabete raglan raincoat
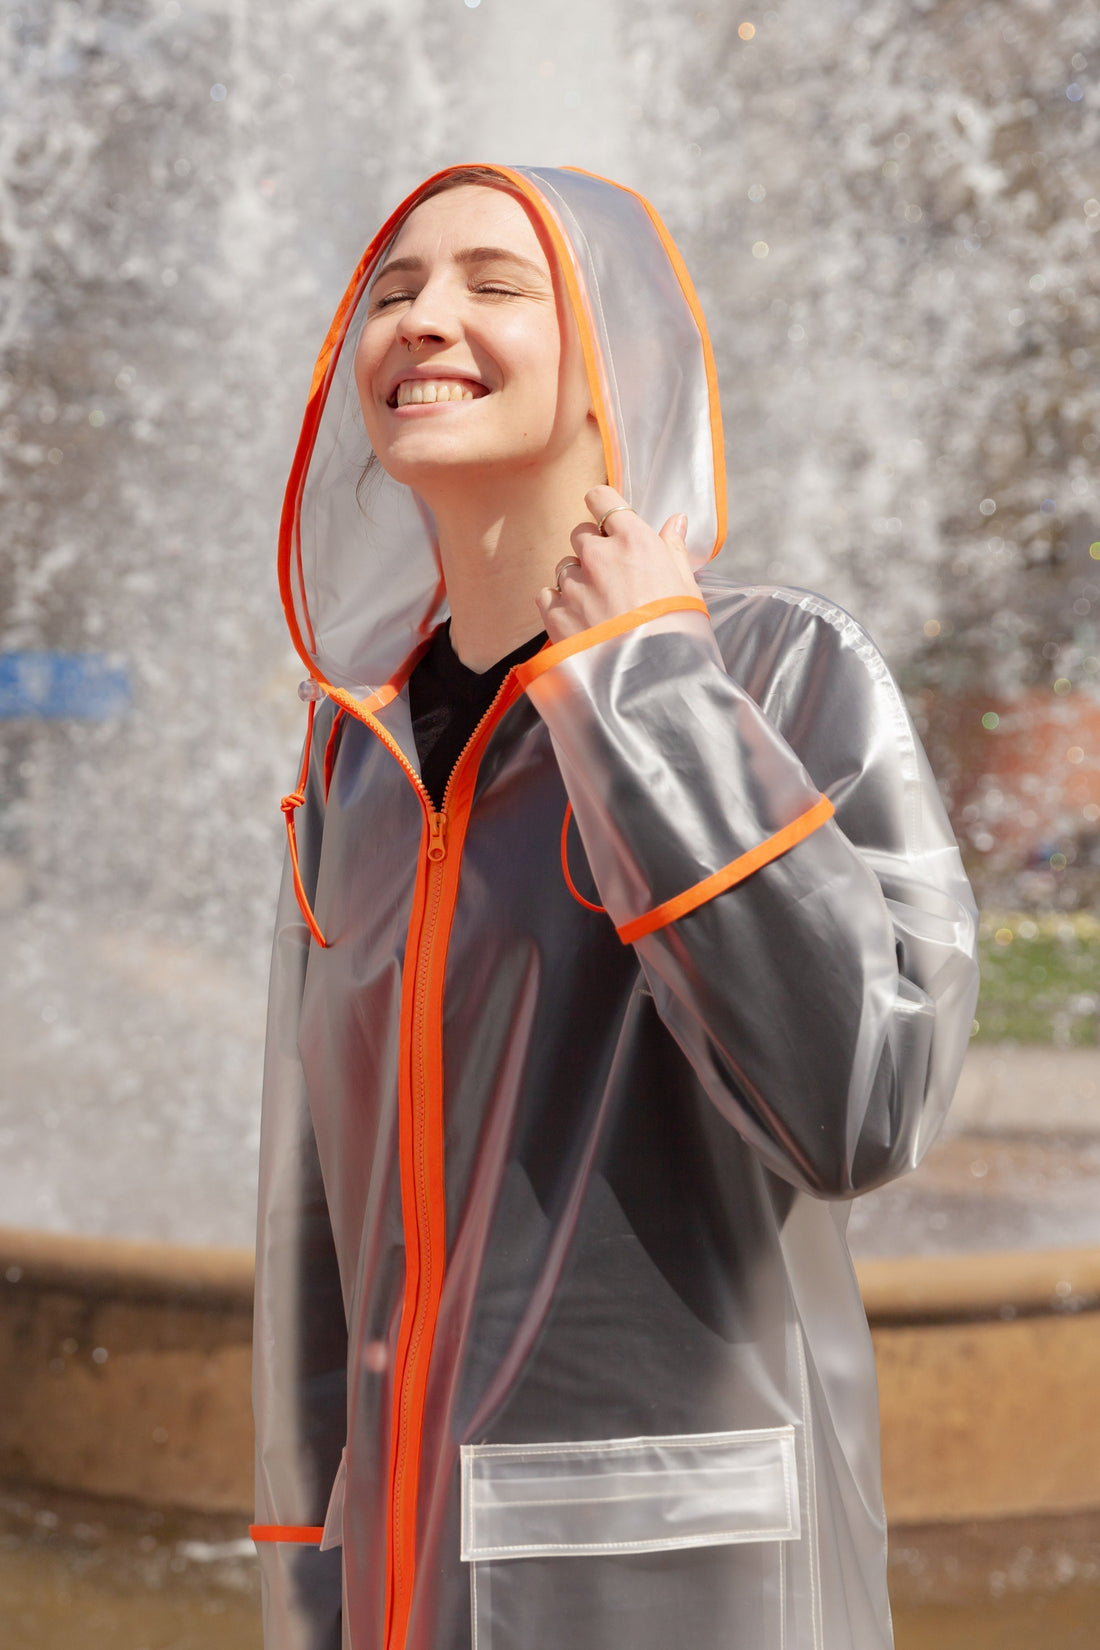
From now on, bad weather is no longer an excuse. With our Sabete raincoat , you'll be perfectly prepared for dog walks or hiking excursions, even in the rain. If the dark clouds clear up while you're out and about, you can fold Sabete and stow it in its back pocket, then wear it like a cross-shoulder bag . Bound edges, a two-way zipper at the center front, patch pockets with flaps, and a large back pocket for storing the coat are Sabete's special details. Depending on the material, you can choose between two finishes: with bound edges or the classic hem allowance.
Length in the center back = 103 – 107 cm
In this tutorial, Sabete was sewn from a transparent and rubberized fabric.
Required materials:
We recommend a water-repellent or rubberized outdoor fabric.
| Outer fabric | Size 34-42 | 2.30 m | 140 cm wide |
| Outer fabric | Size 44-50 | 2.80 m | 140 cm wide |
| 2-way zip | Size 34-50 | 1 piece | 65 cm long |
| Turning tearer | Size 34-50 | 1 piece | 25 cm long |
| edging tape | Size 34-50 | 10 m | 20 mm finished |
| rubber band | Size 34-50 | 1.0 – 1.15 m | 3 cm wide |
| cord stopper | Size 34-50 | 2 pieces | |
| cord | Size 34-50 | 1.00 m | 0.7 mm diameter |
| eyelets | Size 34-50 | 2 pieces | 0.7 mm diameter |
| Backpack buckle | Size 34-50 | 1 piece | 3 cm wide |
Cutting:
Seam allowances are included - 1cm wide or as per marking clips!
The fabric we used is not ironable. Test this with a test iron beforehand and skip ironing if necessary. Cut out the pattern pieces from your outer fabric. Lay the fabric right side up. Place the selvedges parallel to the center so that you can place the back and hood on the fold at the front. The pattern pieces should all be laid with the writing facing up. Always align the grain arrow on all pieces in the same direction and parallel to the selvedge of the fabric. Transfer all notches from the pattern by making a 3mm long snip with scissors or chalk and mark the ends of the darts. Notch the seam allowance on the fold, as this is always the center. Marks define the positions of dart ends, pocket positions, and much more. Transfer these either with chalk or pins. 

You will need fabric:
- 1x back part in the fracture
- 2x front part opposite
- 2x hood in front in the break
- 2x hood at the back opposite
- 1x back pocket
- 2x pocket flap opposite
- 2x pocket flap inside opposite
- 2x front pockets opposite each other
- 2x sleeves at the back opposite
- 2x sleeves opposite each other at the front
- 2x sleeve facings opposite
Sewing instructions:
Seam allowances are included - 1cm wide or as per marking clips!
To sew this coat you will need a sewing machine.
In addition to the description, the colored lines in the pictures show you where a seam needs to be sewn or something needs to be glued.
When sewing, pay attention to the seam allowance included in the pattern. Seam allowances not specifically marked are 1cm wide! Happy sewing! 
We'll start with the sleeves of our new coat. Take the front and back sleeve pieces, place them together, right sides together, and sew the shoulder seams together. 
We placed the seam allowance to the front and stitched it with a stitch the width of a quilting foot. 
Here you can see a detailed photo of how the sleeve has been processed so far. 
Sew the sleeve facings, wrong sides together, with a 0.5cm stitch. We want the seam allowance to be on the outside. 
The highlight of our new coat is the seam allowances, which are finished with pre-purchased bias binding. The seam allowance of the sleeve and the placket are bound with this bias binding. This way, the visible seam allowance is neatly finished with the piping. 
The hem of the panel is also edged with bias tape. 
To prevent the seam allowance of the facing from sticking out quite so much, we stitched it down at the marked positions. 

You'll insert the eyelets into the outer hood at the front. To do this, proceed as follows: Using a hole punch or the punch included in the set and a hammer, punch a hole large enough to accommodate the matching "eyelets with washers." The position of the eyelets is marked on the pattern. Secure the position on the inside left side of the fabric with an additional piece of scrap fabric. 
The eyelets and washers are placed in the tool according to the manufacturer's instructions, the two tool arms are folded together and the eyelets are hammered into the fabric. 
The remaining fabric, which was secured for additional security, is now trimmed to a minimum. Your eyelets are finished! 
Then take the hood pieces from the back and sew them together, right sides together. 
We placed the seam allowances to the left and secured them with a stitch the width of a quilting foot. 
Now place the front hood piece, wrong sides together , on the previously sewn back hood piece and sew them together with a 0.5cm auxiliary seam. Here, too, the seam allowance should be visible on the outside, because... 
… these seam allowances are also edged with bias binding. 

The upper edges of the front pocket are folded over twice and stitched close to the edge. 
We secured the position of the pocket with an adhesive strip, then folded it over 1cm and secured it with a seam close to the edge. 
Here you can see a detailed photo of the front pocket. 
The pocket flap is placed right sides together on the inside of the pocket flap and sewn all the way around.


The prepared pocket flaps are placed, right sides together, in the position in the front piece and sewn on with 1cm. 
Here you can see a detailed photo of how the pocket flap was sewn on. 
This is then stitched down and secured with an additional seam. 
The front piece is now prepared and can be sewn together with the back piece, right sides together, at the side seams. 
The side seam is stitched and fixed to the back with an additional stitch the width of a quilting foot. 
Now you can stitch the previously prepared sleeves, wrong sides together , into the body with a 0.5cm auxiliary seam. Here, too, the seam allowance of the raglan seam will be visible on the outside... 
… and bordered all around with a bias stripe. 
Now take your prepared outer hood and place it, right sides together, against the neckline of the torso. Sew both layers together with a 0.5cm stitch. 
Now it's time to work on the second front hood piece. Sew this piece, right sides together, to the inside of the coat. 
This seam allowance is then also bound with bias binding. The inner hood facing can then be folded upwards... 
… and secured with a 0.5cm auxiliary suture. 
The entire front edge is also edged with bias binding. 
Next, you can add your zipper to the front piece. To do this, follow the zipper markings on the pattern, place the zipper under the bias binding, and sew along the same stitching as the bias binding. 
Here you can see a detailed photo of how we sewed in the zipper. 
The hood tunnel is quilted through and through at an even distance from the front edge and the elastic is inserted beforehand. 
Front view of the finished jacket. 
Now let's move on to the back pocket. The zipper may need to be shortened. If this is the case, the raw edge must be secured with a bias strip. Place the back pocket, right sides together, over the zipper and stitch it in place. Make sure the seam allowance at the end of the zipper is also folded in. 
These inner seam allowances are then gathered together with bias tape. 

Here you can see detailed photos of the bound seam allowance. 

Now we sew one side close to the edge of the back piece. 
Cut the elastic bands to the correct length and position them, right sides together, at the mark in the cut. 
They are then folded back and stitched again. 
Now the elastic bands are secure and in the correct position and the bag can be attached to the back part all around. 
The other side of the zipper is also attached to the back part with a seam. 
The hem is edged with a bias strip and stitched. 

Finally, attach the buckles to your elastic bands in the back.
Your SABETE is ready !
If you are stuck or have any questions, please feel free to contact us by email at info@schnittmuster-berlin.de. We will respond as soon as possible.
Have lots of fun with your new designer piece!
Sincerely, your Schnittmuster-Berlin team.