Sewing instructions for the Wanda vest
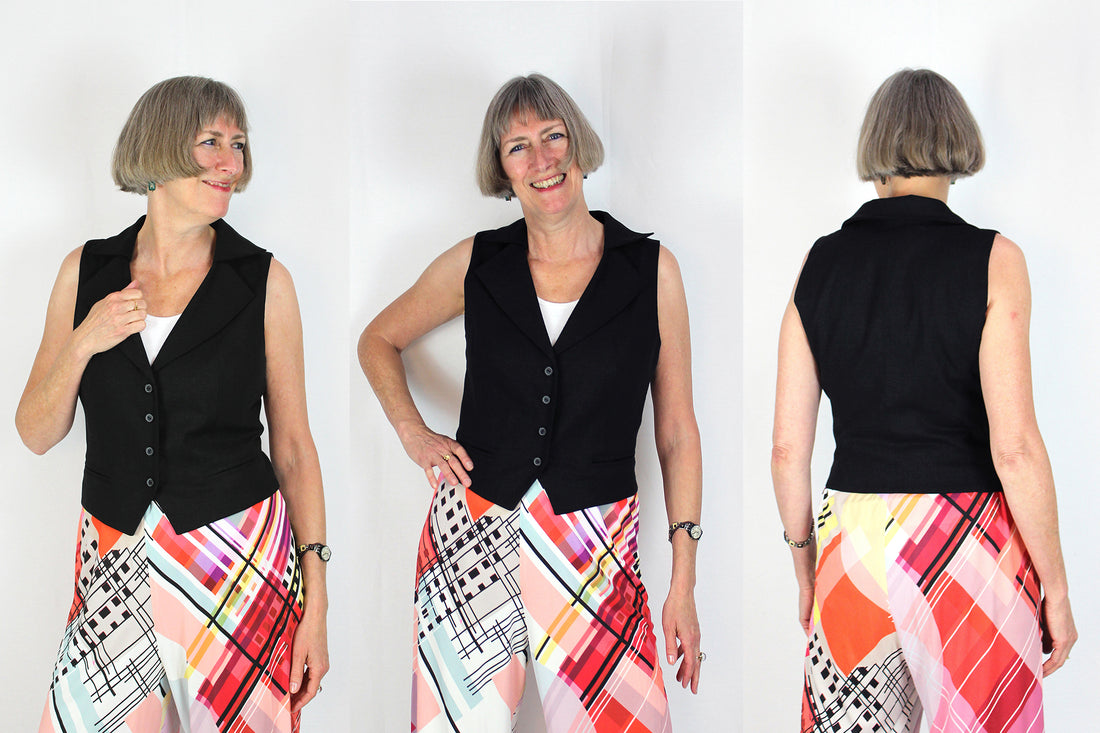
The "Wanda" vest is an elegant and timeless garment that perfectly blends... Style and elegance embodied. With its sophisticated design and unique lapel collar It lends a special charm to any outfit. This vest is a An absolute must-have For fashion-conscious women who appreciate a classic style.
Length at the back center = 43-49cm.
WANDA was sewn from a lightweight wool fabric in this tutorial.
Materials needed:
We recommend lightweight wool fabrics, Tencel , or a firm cotton fabric .
Sizes 34-42- Outer fabric 1.00 m 140 cm wide
- Insert 1.30 m 90 cm wide
Sizes 44-50
- Outer fabric 1.20 m x 140 cm wide
- Insert 1.50 m 90 cm wide
Sizes 34-50
- Lining 0.60 m 140 cm wide
- Buttons, 4 pieces, 15 mm diameter
Just so you know in advance:
If you want to sew the Wanda pattern with recessed armholes, pay attention to the lines in the pattern. This variation is well suited for wide-sleeved blouses, such as our models Wilhelmina , Sil , and Uma .
You can also omit the lapel collar and finish the neckline with a facing to create a collarless Wanda. This gives the garment a simpler look.
Cut:
Seam allowances are including - 1cm wide or as marked
Place the fabric with the right side of the fabric facing up.
You will need the following fabric:
- 2x back piece, mirror image
- 2x back side panel
- 2x pocket bags, opposite each other


Also includes insert:
- 2x front part, mirror image
- 2x front and side panels, mirror images
- 2x reverse part top opposite
- 2x reverse part bottom opposite
- 1x upper collar
- 1x undercollar
- 2x collar bar
- 1x neckhole facing at the back
- 2x front receipt, opposite sides
- 1x rear hem facing
- 4x piping strips
- 2x hem facings opposite front
- 2x strips to cover the incision in the front part (insert only)

You will need the following lining fabric:
- 2x front part, mirror image
- 2x front and side panels, mirror images
- 1x back piece in half
- 2x back side panel
- 2x pocket bags
Sewing instructions:
Seam allowances are including - 1cm wide or as marked
You will need a sewing machine to sew this vest.
The colored lines in the pictures show you, in addition to the description, where to sew a seam or glue something.
When sewing, pay attention to the seam allowance included in the pattern. Seam allowances not specifically marked are 1 cm wide!
Have fun sewing!

You place the back right sides together, close the back center seam and press the seam allowances open.

Next, you close the dart in the front.

Now you can sew the respective side pieces to the front and back pieces, right sides together. Press the seam allowances open.


Now we come to the first masterpiece: the welt pockets.
First, iron the interfacing strip onto the left side, centered on the "slit/cut" in the front piece.

Then, iron all piping strips in half lengthwise, wrong sides together, and secure them with a basting stitch 0.7cm from the folded/ironed edge.
 To position the welt pocket precisely, it's best to draw guidelines on the top of your front piece using chalk. Also mark the endpoints of the pocket opening.

Place the upper piping with the folded edge facing up and the lower piping with the folded edge facing down onto your chalk mark. Now stitch the piping precisely along your guide stitch.

Now cut exactly as marked in the photo at the corners.

Fold the piping inwards through the opening slit.

To the right and left of the piping, the front piece is folded over so that you can stitch down the resulting "triangles".

You sew the pocket bag made of outer fabric to the inside of the upper piping.

You sew the lining pocket bag to the lower piping.

Now stitch the lining bag all the way through, close to the piping. Be careful not to stitch the upper pocket bag; fold it upwards.

Then fold both pocket bags down and stitch all the way through the sides and the top edge from the right side.

Finally, you stitch the pocket bags together on the inside.
Great! Welt pocket finished!

Next, sew the shoulder seams right sides together and press the seam allowances open.

Now you do the same with the "inside" of the vest. The back facing and front facing are sewn together right sides facing at the shoulder, and the seam allowances are pressed open.

Now we come to the second masterpiece: the lapel collar.
First, stitch the collar stands to the upper and lower collars, right sides together. Clip the collar seam allowance slightly at the curve; this will help it lie flat when you press the seam allowance open.

Next, sew the upper collar to the undercollar, right sides together. The upper collar has extra width that you need to work in so that it will fit nicely around your neck.
You cut off the corners.

The reverse pieces are also turned inside out (short edge and outer edge). Again, pay attention to the extra width and then trim the corner.

Now turn the pieces right side out, iron them, and secure the open edges with a basting stitch a foot's width from the edge.

Then, following the cutting line, place the collar onto the lapel and secure them together with a basting stitch. Make sure the upper collar and upper lapel are aligned!

Now you place the collar and lapels on the right side of the torso in exactly the same way and secure them 0.7cm from the edge with a guide stitch.

The facing is placed right sides together and the entire front edge is turned inside out.

The seam allowance is topstitched close to the edge on the facing.

Now, the front hem corner is turned right side out. Leave 1 cm of space at the inner facing edge, because you still need to sew the lining there. The corner is trimmed again as usual. The front edge and hem corner are pressed flat from the right side.

Now the side seam is closed right sides together and ironed open.

Next up is the food:
First, sew the hem facings together right sides facing and press the seam allowances open.

Then you sew the front lining to the side lining right sides together and press the seam allowances open.
 Fold the back lining in half lengthwise, right sides together, and secure the pleat at the center back neckline with a 4cm seam, angled towards the fold. Repeat this process at the hem, except you can omit the angled seam there. Then press the pleat to the right.

Now you can sew the back side panel to the back panel and iron the seam allowances open.

Next, place the front and back pieces right sides together, close the right side seam and press the seam allowance open.

Leave a turning opening in the left side seam. Sew approximately 5cm from both the top and bottom edges. Press the seam allowance open.

Now you also sew the shoulder seams right sides together and iron the seam allowance open.

Now the hem facing is sewn to the lining right sides together and the seam allowance is pressed into the lining.

 In the next step, the entire lining is sewn right sides together to the facing of the vest and the seam allowance is pressed into the lining. The hem remains open.

Next up is the armhole.
The lining and outer fabric are placed right sides together. Now, pin the back armholes together and sew them from the shoulder to the side seam. Then turn everything right side out.
 This is what it looks like from the right side if you've only sewn the back armhole together.

Now go through the hem and pin the front armhole right sides together and sew it.


Next, the hem of the vest is also closed in two steps, right sides together, by sewing from the front corner to the center. The front corner is then trimmed.

The vest is turned right side out again and the seam allowance is topstitched flat on the lining.
Repeat the same process on the other side of the hem. First, sew the hem together, then topstitch the hem seam allowance flat onto the facing through the opening in the side seam of the lining.

You fix the hem facing "in the shadow of the seam". That means you stitch it all the way through at the center back and the side seam.
 Now you can close the opening in the left side seam with a narrow seam.

Your vest is now almost finished; all that's missing are the buttons and buttonholes. For the buttonholes, refer to the position shown in the pattern.
Your WANDA is finished!
If you get stuck or have any questions, please feel free to contact us by email at info@schnittmuster-berlin.de. We will reply as soon as possible.
Have lots of fun with your new designer piece!
Sincerely, your Schnittmuster-Berlin team.